fbpx

Does Pop-Filter Make a Difference?

Pop-filters are often used for voice-over or music recording. They are also quite cheap, but how effective are they actually?

In this article, we will overview how effective pop-filters are at preventing plosives and we will look at other benefits from using pop-filters because I can tell you right now, they serve many purposes when recording audio.

Preventing plosives

Pop-filters work by diffusing air, which would otherwise hit a sensitive diaphragm in a microphone creating a distorted plosive.

To answer shortly regarding whether pop-filters make a difference when recording – they do. Pop-filters will attenuate plosives and prevent some of the air from hitting the microphone. Still, they will not guarantee full protection against plosives, they will only mitigate them. Good technique and avoiding harsh “p” and “b” sounds will help to prevent all plosives.

Here is a test of how different pop-filters mitigate plosives and sound:

No pop-filter:

Microphone: Rode NT1 | No pop-filter

Nylon mesh pop-filter:

Microphone: Rode NT1 | Nylon mesh pop-filter

Metal mesh pop-filter:

Microphone: Rode NT1 | Metal mesh pop-filter

Acoustic foam pop-filter / windscreen:

Microphone: Rode NT1 | Acoustic foam pop-filter

Without a pop-filter, there are a few plosives in the recording that also made it clip and distorted the audio.

Using any of the three different types of pop-filters significantly reduced plosives.

Distancing

Today pop-filters are mainly used to prevent or at least attenuate plosives, but they are also very useful for controlling the distance between a voice-over artist or singer and a microphone.

Usually, you want to speak two fists away from your microphone. Although, it sometimes depends on what kind of voice you are trying to achieve.

Nevertheless, with a pop-filter in front of you will never need to worry about speaking too close to a microphone as pop-filter will prevent you from doing so. You may still speak from too afar, however, that’s usually less of a problem.

Changing distance from your microphone may affect how you sound due to proximity effect. Therefore, for consistent performance pop-filter is a very handy tool to use.

Protecting from spit

If I am not mistaken, pop-filters were primarily made to prevent spit from coming into the microphone and attenuating plosives has been noticed as a side benefit.

Well, even if it is not true, pop-filter is still a great tool to avoid spit from coming into your microphone, which might ruin it over time.

The problem may not be as noticeable at first, however, if allowed to accumulate your microphone’s quality might gradually diminish. Condenser and ribbon microphones are especially susceptible to such damage.

Different types of pop-filters

Pop-filters come in many styles and there are a couple of nuances about them, so let’s look into each.

Nylon pop-filter

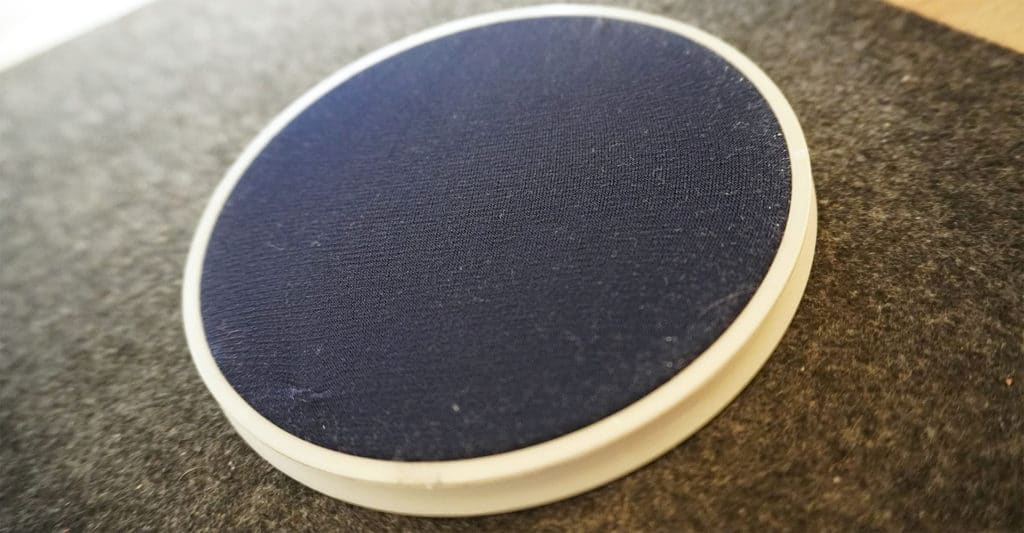
Nylon pop-filters are the most standard option you will find. You can get one for as much as $10 and their best advantage is their low price.

But they may obscure your vision when looking into a script. Nylon mesh pop-filters usually have thick outlines that obstruct the vision and they are a bit hard to look through.

Not a deal breaker, but it can be better.

Also, nylon pop-filters are easy to tear and sometimes it is a bit of a hassle to attach them to your swivel arm or a stand.

For better performance you might want to look for double layer pop-filter.

Metal mesh pop-filter

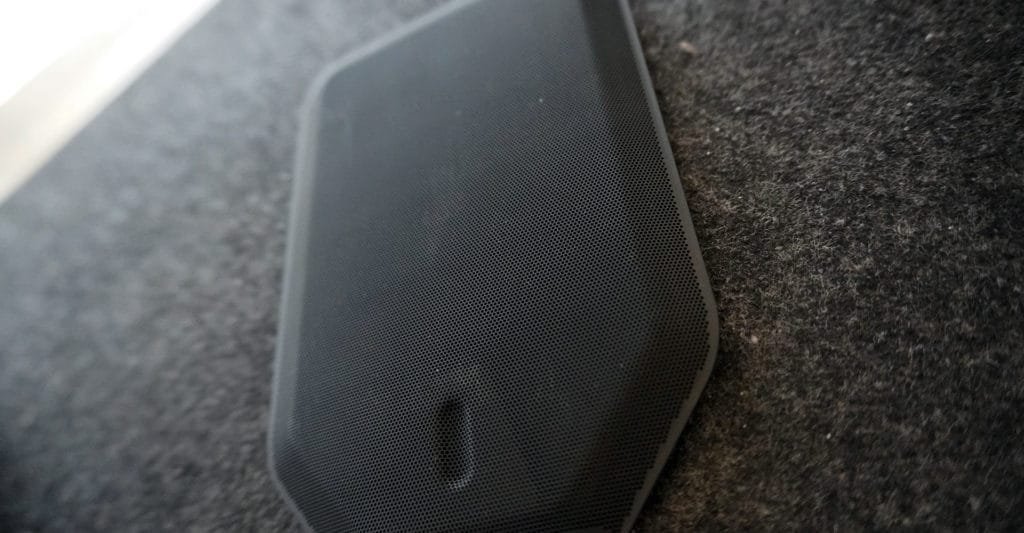
Metal mesh pop-filters are similar to nylon pop-filters, but they don’t have annoying outlines to obstruct your vision. Nevertheless, you will still be looking through a mesh.

Also, it is much harder to tear metal than nylon, so they are more durable.

These benefits come at a slightly higher cost, but pop-filters are cheap, to begin with, so you might want to invest an additional $10 and save the hassle.

For even better performance you might want to look for double layer pop-filter.

Acoustic foam pop-filter

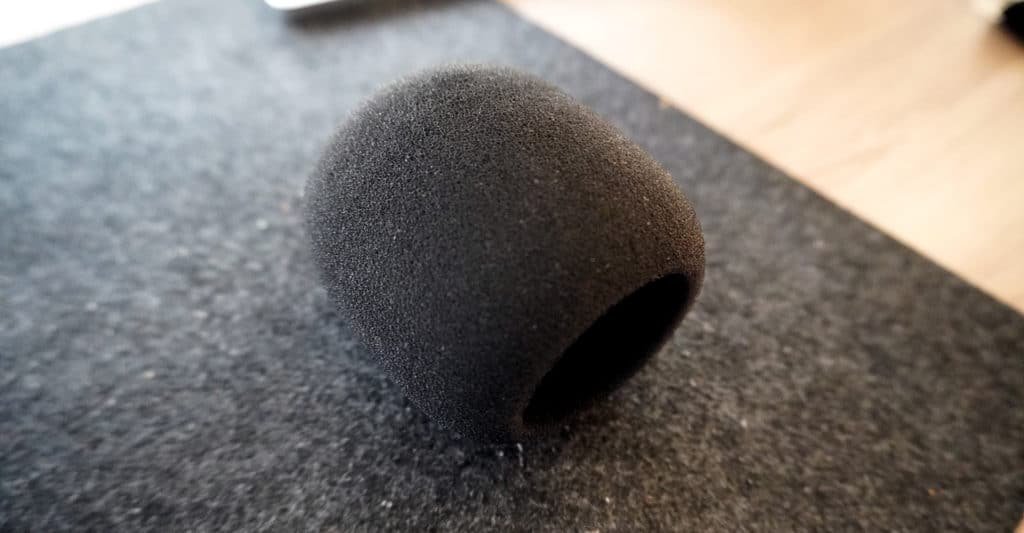
Acoustic foam pop-filter is a different type of pop-filter altogether. These are the ones you see news reporters putting on their microphones with promotions on them.

They may be more often called windscreens, but the purpose is the same – to prevent plosives and avoid spit.

This type of pop-filters won’t help you with controlling the distance between the speaker and the microphone like mesh pop-filters would.

Acoustic foam pop-filters are better at preventing plosives from all directions, so if you are planning to do interviews or use your microphone outdoors, they are a better option. Not that you could attach mesh pop-filter directly to your microphone anyway.

They are very handy when dealing with a windy environment, also they are easier to carry around. In addition, I like to put acoustic foam pop-filters on my microphones when not using them to prevent them from collecting dust.

When I am traveling I am also putting acoustic foam pop-filters onto microphones to help absorb some of the potential damage.

So far so good. But there is more. They are extremely cheap and you can get a bunch of them for less than $10.

So, why don’t we all use acoustic foam pop-filters?

Mainly because they change the sound. While mesh pop-filters may be obtrusive and a bit more expensive, they don’t mess with the most important part of audio recording, which is your sound quality.

Acoustic foam pop-filters attenuate higher frequencies making your audio sound a bit muffled. The thicker the foam the more you will notice the difference.

Besides, they are not as good at avoiding plosives compared to mesh type pop-filters.

Built-in pop-filter

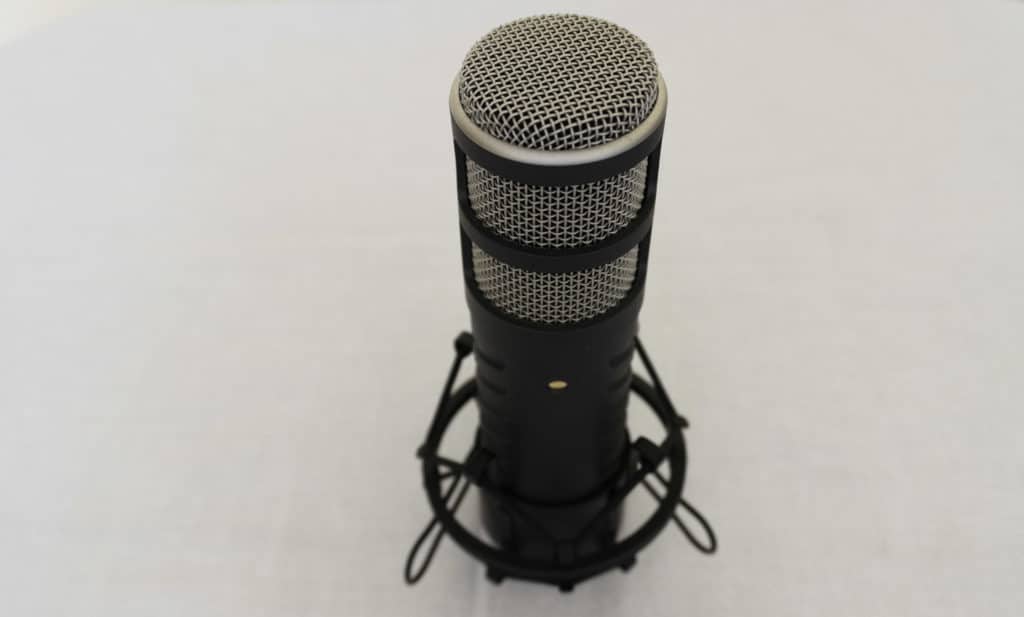
Some of the microphones have built-in pop-filters/windscreens. For example, Rode Procaster has one. Other microphones have acoustic foam pop-filters designed especially for them. For example, Shure SM7B.

These sorts of microphones usually are designed taking into account a built-in pop-filter and sound good with it.

You might still want to use additional mesh pop-filter for additional protection against plosives.

Do pop-filters prevent background noise?

There is a bit of misunderstanding regarding pop-filters and background noise. They DO NOT prevent background noise.

They only diffuse air that is coming from your mouth into the microphone. Also, if you are in windy environment they will attenuate plosives originating from the wind.

But they do not attenuate noise. Pop-filters are made to diffuse the air which physically hits the diaphragm inside the microphone, they don’t stop the noise.

Makeshift pop-filters

Sometimes you don’t have access to a pop-filter. You can either try recording without it, or you might try some alternatives.

If you have two pencils, you can put them together and hold in front of you when recording. The pencils will split and diffuse the air that may otherwise reach the microphone.

If you don’t have access to the pencils either, then fingers will work just as well.

How to avoid plosives without a pop-filter?

Pop-filters have their use and are beneficial, but if you don’t fancy using one you can get away without it.

When recording, the best technique to avoid plosives is placing the microphone a bit to the left or the right of your mouth so that the air from your mouth would go past it. At the same time, the microphone should be facing your mouth to catch most of the sound.

This technique will probably prevent more plosives than any pop-filter could.

1 thought on “Does Pop-Filter Make a Difference?”

Show Comments

How to Choose Headphones for Audio Editing?

Choosing the correct headphones is essential for understanding how your recording truly sounds. In audio editing, you have to hear unaltered audio so you can perceive it accurately.

That’s what studio headphones are made for.

In this article, we will look at different types of headphones and what they are suitable for and we will talk about what is the best option for your budget.

Key aspects to look for

When you are choosing your headphones for audio editing, don’t make the mistake of buying headphones that are meant for listening to music. Those are made to enhance your listening experience, but they have curved frequency response and are not suited for audio editing.

Instead, look for studio headphones. They are meant to be used while editing your audio and have a flatter frequency response curve.

You want a flatter frequency response because these headphones should not be made to make your audio sound better. Instead, they should be able to expose flaws in the audio, so you can fix them.

Also, if you are planning to buy headphones for monitoring audio, you need a pair of headphones that don’t leak sound, otherwise, it will bleed into your recording and ruin it. You might even consider buying two headphones, one for monitoring and one for audio editing. But some headphones are good at both.

With all of this said, if you are not serious about audio editing and just plan to work on a project or two, then headphones that you already have will probably be fine. It is nice to have studio headphones, but for starters, I am sure anything you have will suffice.

Guide to headphone specifications

Headphone specifications are not like computer specs, where more is better. They provide much less information regarding headphones’ quality, but we will try and look at what they mean and what you should be looking at.

Frequency response range – Most of the headphones will have at least 20Hz – 20,000Hz (5Hz – 20kHz) frequency response range. It means that they are able to output these frequencies. Some headphones will go as wide as 5Hz – 40,000Hz, however from 20,000Hz additional range doesn’t matter much, because we can’t hear those frequencies anyway.

Besides, most of the microphones are limited to 20,000Hz frequency response range and a lot of them don’t even go as far. Also, most of us can’t hear frequencies over 16,000Hz. Some people can, however, even to them those frequencies are hardly noticeable.

So, as long as your headphones have 20Hz – 20,000Hz frequency response range, you are set and that’s more than enough for audio editing.

Frequency response graphic – This is not the same as a frequency response range, instead, you will be looking at a graphic, such as this one:

You can find frequency response graphics of various headphones at https://www.rtings.com/

This is an important aspect to look for when choosing your headphones. It shows how your headphones are representing different frequencies.

Nevertheless, the frequency response graph could be misleading, you are better to trust your ears than the graph as there are many other factors that affect the sound of the headphones. Don’t make judgments on how the headphones will sound just from looking at the graph, rather use it as a rough reference.

This graphic will roughly tell you what kind of sound to expect from the headphones. Although it is always better to just try them on and listen, alas, that’s not always possible.

When choosing headphones for audio editing, you will want to look for flat sounding headphones so that you could accurately identify problems within the audio when editing.

Also, high-quality headphones from trusted brands more or less have decent frequency response graphics, while low-end headphones might not be as accurate

Impedance – Impedance determines the resistance to the current flow. We just need to know that the higher the impedance, the more power we need to drive headphones.

High impedance headphones will sound more clear and less distorted. Generally, they are more suited for professional use and audio editing. However, this comes at a cost. You will probably need a dedicated pre-amp to run them because they require more power than a laptop or a smartphone can provide.

Low impedance headphones are suited more for general use. They may not sound as good as high impedance headphones, but you will be able to power them with any device, including your smartphone.

32 Ohms is becoming a common impedance for many headphones, however, you will find headphones with impedance ranging from 8 to 600 Ohms and occasionally even higher than that.

Generally, anything below 50 Ohms is considered low-impedance headphones and above 50 Ohms – high-impedance headphones. You will find many studio headphones, meant for audio editing, have higher impedance.

Sensitivity – Sensitivity is determined by dB SPL. It refers to how loud your headphones can get with given signal strength.

More sensitivity will allow you to listen louder, but it doesn’t determine the quality of your audio.

Most of the headphones have sensitivity between 90-115 dB SPL, while earbuds usually have it in between 80-125 dB SPL.

For audio editing, sensitivity doesn’t matter much if you have headphones pre-amps that can power them.

Closed-back headphones

Most of the headphones that we are familiar with are closed-back. They are made to not leak sound.

Closed-back headphones are great to use in a cafe or other public spaces, they are suitable at home when you don’t want to annoy your roommates or family and they are necessary for monitoring your audio when recording.

You don’t want any of the sound from your headphones to leak into the recording and create bleed effect. For this reason, closed-back headphones are used for monitoring audio. Usually, studio headphones are made to clamp your ears quite tightly to avoid this problem.

For audio editing, you don’t necessarily have to use closed-back headphones, but they are preferred for monitoring, although getting good quality earbuds that don’t leak a sound is also an option.

With that said, if you plan to buy one pair of headphones and plan to use them for everything, closed-back headphones is the way to go.

Open-back headphones

Open-back headphones are, as the name suggests, open at the back and leak sound.

They are not as common as closed-back headphones and are used less frequently due to limitations where they can be used. Regardless, they excel at the audio quality when mastering and mixing your audio, which is a very important part of audio editing.

Their main advantage to other types of headphones is a wider soundstage. You will feel the most difference in bass when comparing open-back headphones to closed-back.

Compared to closed-back headphones, they are airier, less confined and compressed due to the pressure not being stuck into the headphones. With open-back headphones, you will experience a wider soundstage feel as they sound somewhat of a mix between headphones and speakers.

Open-back headphones will not protect you from outside sounds. This might be good or bad depending on where you use it. You might want some background sound coming in for a more natural experience, however, you don’t want any noise.

In general, open-back headphones will be more pleasant to listen to, however, they leak a lot of the sound and are not recommended for use in public or monitoring audio.

You need at least one pair of closed-back headphones for audio monitoring and general use, however, if you can afford it, buying a pair of open-back headphones might help you with audio editing.

Bluetooth headphones

Bluetooth headphones are rarely considered for audio editing and there are a few reasons for that.

Bluetooth headphones, obviously, use bluetooth connection which is vulnerable to interruptions by other appliances.

They have to integrate batteries into the bluetooth headphones which is not enough to power high-impedance headphones. Therefore, most bluetooth headsets will have low-impedance audio quality.

You are also paying extra for comfort features (wireless connection, battery) that are not beneficial for audio editing. It means you are spending money on comfort rather than audio quality and the same amount of money would give better audio quality if spent on wired headphones.

Wireless headphones will not connect to your dedicated pre-amp, which means they are limited to whatever measly built-in pre-amps they have and won’t provide much output.

I know it seems that I am bashing bluetooth headphones, which I am. But that is just for audio editing.

I am not saying they are bad overall, but they are not made for audio editing as they cater more for comfort and convenience rather than audio quality and the latter is much more important in audio editing.

You will want to use bluetooth headphones for casual listening, not for mixing or mastering audio. However, there could be an argument for using them as monitor headphones as the audio quality is not as important while monitoring.

Earbuds

Earbuds will produce lower-quality audio as they don’t have drivers as large as headphones, which makes them prone to distortion.

In addition, they provide audio directly into your ear canal, bypassing the outer part of your ear. The outer part of our air affects how we hear the sound and without it, the sound is not the same.

If possible, you don’t want to use earbuds for editing audio, however, they still might be used for monitoring. In fact, you don’t need the best quality sound when monitoring, that’s only essential when editing audio.

Some people prefer earbuds when recording long sessions because they don’t clamp on ears and are more comfortable for long wear.

Just make sure you are using earbuds that don’t bleed any sound as that might be an issue.

On-ear vs over-ear

In terms of leakage on-ear headphones sometimes can be better at containing sound compared to over-ear headphones. Although, that varies a lot with each pair of headphones.

On-ear headphones are smaller and easy to carry around, but similarly to bluetooth headphones, that is not the feature you should focus on when looking for audio editing headphones.

Over-ear headphones will block out more of the outside sound from coming in. But most importantly they are larger and can fit in bigger drivers to produce more accurate sound and therefore, are preferred for audio editing.

There are not too many on-ear headphones meant for audio editing.

We have overviewed different types of headphones and their differences. Now let’s look at specific headphones that you might want to choose.

I added some reviews from respectable Youtube channels, but it is all summarized in notes for a quick scan.

Audio-Technica ATH-M20x – $49 | £39 | Closed-back | Over-ear | Frequency response 15Hz – 20,000Hz | Sensitivity 96 dB | Impedance 47 Ohms | 40mm driver | Weight 190g | Website | Consumer Research Studios review| Notes: Enhanced Bass frequencies | Good clarity | Budget headphones | Decent build quality

Source: https://reference-audio-analyzer.pro/

Audio-Technica ATH-M30x – $69 | £53 | Closed-back | Over-ear | Frequency response 15Hz – 22,000Hz | Sensitivity 96 dB | Impedance 47 Ohms | 40mm driver | Weight 220g | Website | Consumer Research Studios| Notes: Slightly enhanced bass | Enhanced mids | High clarity | Budget headphones | Good value | Decent build quality

Source: https://reference-audio-analyzer.pro/

Sennheiser HD280Pro – $80 | £99 | Closed-back | Over-ear | Frequency response 8Hz – 25,000Hz | Sensitivity 113dB SPL | Impedance 64 Ohms | Replaceable headband and earpads | Weight 285g | Website | Sanjay C review | Sweetwater review | Tomas Villegas review | Notes: Industry-standard | Enhanced bass | Subdued highs | Amazing isolation | Often recommended

Source: https://reference-audio-analyzer.pro/

Shure SRH440 Pro – $92 | £58 | Closed-back | Over-ear | Frequency response 20Hz – 20,000Hz | Sensitivity 105dB | Impedance 44 Ohms | Detachable cable | 40mm driver | Weight 272g | Website | Sweetwater review | Notes: Good clarity | Good isolation

Source: https://reference-audio-analyzer.pro/

Sony MDR 7506 – $95 | £92 | Closed-back | Over-ear | Frequency response 10Hz-20kHz | Sensitivity 106 dB SPL | Impedance 63 Ohms | Driver 40mm | Replaceable earpads | Weight 230g | Website | Booth Junkie review | Sanjay C review | Consumer Research Studios review | Notes: Flat sound | Industry-standard | Good sound isolation | Very crisp and articulate | Perfect for detecting flaws in audio | Often recommended

Source: https://reference-audio-analyzer.pro/

Audio-Technica ATH-M40x – $99 | £75 | Closed-back | Over-ear | Frequency response 15Hz – 24,000Hz | Sensitivity 98 dB | Impedance 35 Ohms | Detachable cable | 40mm driver | Weight 240g | Website | Podcastage review | Consumer Research Studios | Notes: Flat sounding | Comfortable for long wear | Slightly enhanced mids | High clarity

Source: https://reference-audio-analyzer.pro/

Audio-Technica ATH-M50x – $149 | £113 | Closed-back | Over-Ear | Frequency response 15Hz – 28kHz | Impedance 38 Ohms | Sensitivity 99dB | Detachable cable | Multiple cables | Weight 285g | Website | Marques Brownlee review | Consumer Research Studios review | Sanjay C review | Notes: Good isolation | Heavily enhanced bass | Not very neutral | Pleasant for listening to music | Good all-around headphones | Good value | If you had to buy one pair of headphones for everything, these are a great choice | Often recommended

Source: https://reference-audio-analyzer.pro/

Beyerdynamic DT 990 PRO 250 Ohms – $159 | £109 | Open-back | Over-ear | Frequency response 5Hz – 35,000Hz | Sensitivity 96dB | Impedance 250 Ohms | Removable pads | Weight 249g | Website | Notes: Sounds similar to speakers | Wide soundstage | Great sound separation | Enhanced treble | Comfortable |Not recommended for public use or monitoring audio | Often recommended

Source: https://reference-audio-analyzer.pro/

Beyerdynamic DT 770 250 Ohms – $165 | £105 | Closed-back | Over-ear | Frequency response 5Hz – 35,000Hz | Sensitivity 96 dB | Impedance 16/32/80/250 Ohms | 45mm driver | Detachable pads | Weight 270g | Website | Notes: Enhanced treble | Comfortable | Great sound separation | Often recommended

Source: https://reference-audio-analyzer.pro/

Beyerdynamic Dt 880 Pro – $185 | £155 | Semi-Open | Over-Ear | Impedance 250 Ohms | Frequency response 5Hz – 35,000hz | Sensitivity 96dB | Replaceable headband | Weight 290g | Website | Joshua Valour review | Notes: Enhanced treble | Crisp | Good separation | Not recommended for public use or audio monitoring

Source: https://reference-audio-analyzer.pro/

AKG K702 – $198 | £108 | Open-back | Over-Ear | Frequency response 10Hz – 40,000Hz | Sensitivity 105 dB SPL | Impedance 62 Ohms | Replaceable pads | Detachable cable | Weight 231g | Website | Marques Brownlee review | Notes: Wide soundstage | Flat sound | Very comfortable | Not recommended for public use or audio monitoring

Source: https://reference-audio-analyzer.pro/

Neumann NDH20 – $500 | £503 | Closed-Back | Over-Ear | Frequency response 5Hz – 30,000Hz | Sensitivity 114 dB SPL | Impedance 150 Ohms | 38mm drivers | Foldable | Detachable cables | Two cables | Weight 1170g | Website | Sweetwater review | Notes: Flat sound | Durable | Comfortable | Often recommended

Source: https://www.soundonsound.com/

Conclusion

If I had to choose one pair of headphones for everything, including listening to music, audio editing and monitoring I would choose Audio-Technica ATH-M50x.

If you are in a position where you already have headphones for listening to music and are only looking for closed-back audio editing headphones, then I would look at Sony MDR 7506 at ~$90, Beyerdynamic DT 770 250 Ohms at ~$165 or Neumann NDH20 at ~$500 depending on how much money you are willing to spend.

If you would like a pair of nice open-back headphones for audio editing, I would get Beyerdynamic DT 990 Pro 250 Ohms.

If you are on a tight budget I would just get the cheapest headphones that you can afford from the list.

1 thought on “How to Choose Headphones for Audio Editing?”

Show Comments