You’ll be required to get a decent amount of equipment for audio recording. In this tutorial, we’ll overview what you need to get to begin recording high-quality audio and what is the best gear set up at different price points for specific tasks such as voice-over, podcast, gaming, stage performance and music production. We’ll look into multiple different microphones and audio interfaces that pair well together, providing enough clean gain.
1. Recommended setups
Assuming you already have a computer, to start recording high-quality audio, you’ll need an XLR microphone, an audio interface with built-in pre-amps and 48v phantom power, a microphone stand, a shock-mount and an XLR cable. You may also require an activator (inline pre-amp) such as FetHead or Cloudlifter if your pre-amps don’t provide enough clean gain.
Below are some recording gear setup recommendations at different price points that’ll work and you can pick up without worrying about something not matching.
Likely even the cheapest mic stand will suffice for any of these microphones and any condenser microphone can work with any lower-tier audio interface mentioned, but if you spend a lot of money on a good microphone, it’s wise to spare some money for a decent audio interface and a mic stand, although you could invest in them later if you wish.
With dynamic microphones, be cautious when choosing an audio interface. Some dynamic microphones require quite a bit of gain and not all audio interfaces can provide enough. The ones mentioned above are sufficient for respective microphones.
2. How to choose the correct microphone?
XLR or USB microphone?
The first thing you’ll need for recording audio is a microphone. You have the option to choose between XLR and USB microphones.
XLR microphones will provide high audio quality, but compared to USB microphones, they will cost more and require additional gear to work, which could accumulate to a hefty price tag. For an XLR microphone to work, you’ll be required to purchase an audio interface, XLR cable, shock mount and microphone stand. However, occasionally some of these are included in the bundle with a microphone.
USB microphone could be the single piece of equipment you will buy if you’re willing to sacrifice audio quality and future upgrade options. They come with a USB cable that can be attached straight to the computer via a USB port without the need for an audio interface or XLR cable. Usually, USB microphones come with all the requisite gear such as a microphone stand and mount, although they are often low quality. This means you can plug the USB microphone into the PC and it’ll work immediately without hassle.
If you choose to buy a USB microphone, I recommend getting one of these microphones at different price points:
- Up to $50 – Blue Snowball ICE
- Up to $100 – Blue Yeti Nano
- Up to $150 – Audio Technica AT2020 USB+
- Up to $200 – Rode NT-USB
- Up to $250 – Rode Podcaster
Most USB microphones are condenser type. Rode Podcaster is the only dynamic USB microphone out of all the recommendations above.
The list includes USB microphones up to $250, but it doesn’t make much sense to buy a USB microphone priced above $150 as you can get an XLR microphone with an audio interface for that price. Possibly the only reason for buying a USB microphone at that price would be simplicity.
Dynamic or condenser microphone?
I would choose an XLR microphone if you require higher audio quality. If you go this route, you’ll be choosing between a condenser and a dynamic microphone as there are plenty of each. Both of which have their pros and cons.
Dynamic microphones are the best suited for not-perfect recording conditions: Podcasting, streaming, video games, stage performances, travel and home recording, but they are versatile and could be used in studios and voiceovers as well. They usually have better off-axis rejection, are sturdy and less sensitive, which often results in a better signal-to-noise ratio.
Condenser microphones produce higher-quality audio but are more sensitive and break faster than dynamic microphones. Hence condenser microphones are best suited for recording voice-overs or singing in a studio-quality environment where the background noise and bad acoustics aren’t an issue.
| Dynamic microphones | Condenser microphones |
| Pros: | Pros: |
| | |
| Cons: | Cons: |
| | |
Dynamic microphones are generally cheaper compared to condenser microphones, yet so often, dynamic microphones require a lot of gain which makes it impossible to pair them with cheaper audio interfaces lacking gain power from built-in pre-amps. This could lead you to buy a fethead or more expensive audio interface causing you to spend the extra cash and making a dynamic microphone not so cheap anymore. But there’re some good options with reasonable sensitivity at a low price as well.
Condenser microphones will suffice with almost any entry-level audio interface as they have built-in electrical circuitry and use phantom power. Therefore, it makes sense to buy a condenser microphone if you intend to save up on the audio interface. However, entry-level condenser microphones often have high self-noise (20dB and higher) which often makes them unappealing. I would recommend condenser microphones for the home studio only if you planned to treat room acoustics or if you wish to save up.
Recommended dynamic microphones
| Price | Voice over | Podcast, Gaming, Radio | Stage performance | Music production | Overall best |
| Up to $75 | AKG Pro P3S | AKG Pro P3S | AKG Pro P3S | AKG Pro P3S | AKG Pro P3S |
| Up to $100 | Shure SM58 | Rode PodMic | Shure SM58 | Shure SM58 | Shure SM58 |
| Up to $200 | Sennheiser e945 | Rode PodMic | Sennheiser e945 | Sennheiser e945 | Sennheiser e945 |
| Up to $250 | Rode Procaster | Rode Procaster | Shure Super 55 Deluxe | Shure Super 55 Deluxe | Rode Procaster |
| Up to $300 | Electro-Voice RE320 | Electro-Voice RE320 | Shure Super 55 Deluxe | Shure Super 55 Deluxe | Electro-Voice RE320 |
| Up to $400 | Shure SM7B | Shure SM7B | Shure KSM8/B Dualdyne | Shure SM7B | Shure SM7B |
| Up to $600 | Shure SM7B | Shure SM7B | Shure KSM8/B Dualdyne | Shure SM7B | Shure SM7B |
| Up to $800 | Neumann-BCM 705 | Neumann-BCM 705 | Shure KSM8/B Dualdyne | Shure SM7B | Shure SM7B |
Recommended condenser microphones
I’ve included condenser microphones in podcast, gaming, radio and stage performance categories as an alternative to dynamic microphone sound, but generally, dynamic microphones are better designed for these activities.
| Price | Voice over | Podcast, Gaming, Radio | Stage performance | Music production | Overall best |
| Up to $75 | MXL 990 | MXL 990 | – | MXL 990 | MXL 990 |
| Up to $100 | AT 2020 XLR | AT 2020 XLR | – | AT 2020 XLR | AT 2020 XLR |
| Up to $150 | AT 2035 | AT 2035 | AT2010 | AT 2035 | AT 2035 |
| Up to $200 | AT 2035 | AT 2035 | AKG Pro Audio C5 | AT 2035 | AT 2035 |
| Up to $250 | Rode NT1-A | Rode NT1-A | Sennheiser e865 | Rode NT1-A | Rode NT1-A |
| Up to $300 | Rode NT1 | Rode NT1 | Shure BETA 87A | Rode NT1 | Rode NT1 |
| Up to $400 | Rode NT2A | Rode Broadcaster | Sennheiser e 965 | Rode NT2A | Rode NT2A |
| Up to $600 | Rode NT2A | Rode Broadcaster | Lewitt MTP-940-CM | Rode NT2A | Rode NT2A |
| Up to $800 | Lewitt LCT 540 Subzero | Rode Broadcaster | Neumann KMS 104 | Lewitt LCT 540 Subzero | Lewitt LCT 540 Subzero |
| Up to $1000 | AKG C414 XLII | AKG C414 XLII | Neumann KMS 104 | AKG C414 XLII | AKG C414 XLII |
| Up to $1200 | Neumann TLM 103 | Neumann BCM 104 | Neumann KMS 104 | Neumann TLM 103 | Neumann TLM 103 |
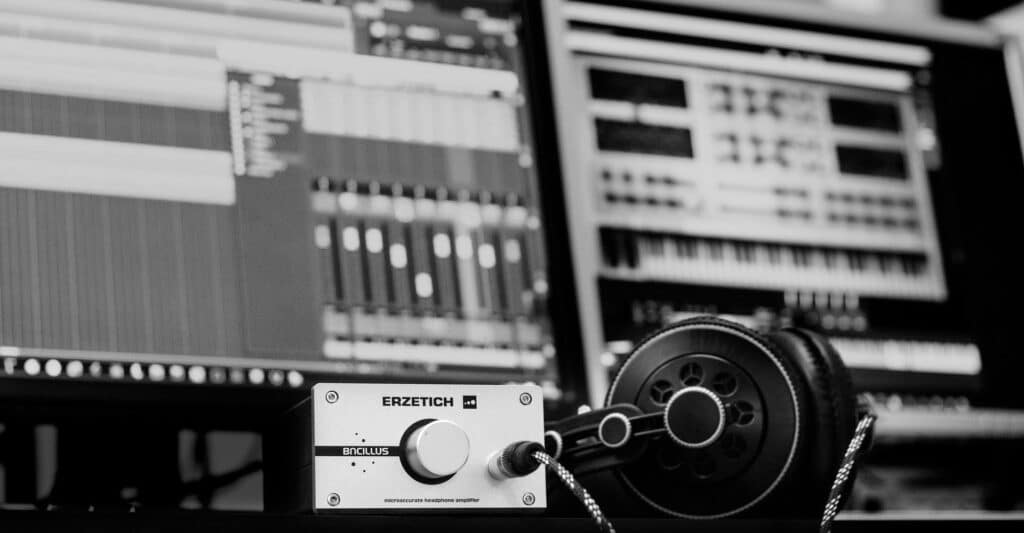
3. How to choose an Audio interface?
Contrary to a USB microphone, an XLR microphone won’t plug directly into a computer but will provide better sound quality. XLR microphones use an XLR connection which has to go through an audio interface first. Most audio interfaces have built-in pre-amps that’ll increase signal level and 48v phantom power is usually provided for condenser microphones.
Audio interfaces have different amounts of XLR inputs allowing the use of as many microphones simultaneously. In addition, usually, an audio interface will work as an amplifier for your headphones.
The pre-amps within an audio interface or dedicated pre-amp might color the sound of your microphone a bit. Still, generally, for most people, the best audio interface is the one that provides enough clean gain, multiple XLR inputs and desired features. For voiceovers, gaming and podcasts, you don’t need many features and the main aspect will be gain range, input lines and price. On the other hand, musicians might require much more than just basics.
If you plan to use multiple microphones simultaneously, purchase an audio interface with multiple input lines because it’ll limit you to a certain amount of microphones you can use simultaneously.
With condenser microphones, you don’t need to worry about gain; they are sensitive and will work with all audio interfaces on the list below. However, dynamic microphones aren’t as sensitive and require more pre-amps. Also, consider that not all audio interfaces have equal pre-amps; some of them are completely clean and others might introduce some background noise. With most of the entry-level audio interfaces, you’ll hear background noise when turning the gain knob to the max.
Popular audio interfaces
| Audio interface | Price | Gain range | Input lines |
| M-Audio M-Track Solo | $49 | 54dB | 1 |
| M-Audio M-Track Duo | $69 | 54dB | 2 |
| PreSonus AudioBox USB 96 | $99 | 52dB | 2 |
| Behringer U-Phoria 204HD | $109 | 56dB | 2 |
| Focusrite scarlett 2i2 | $159 | 56dB | 2 |
| PreSonus Studio 24c | $159 | 50dB | 2 |
| Elgato Wave XLR | $159 | 75dB | 1 |
| Behringer U-Phoria 404HD | $169 | 56db | 4 |
| Zoom PodTrak P4 | $219 | 70dB | 4 |
| SSL SSL2 | $269 | 62dB | 2 |
| PreSonus ioStation 24c | $319 | 80dB | 2 |
| M-Audio AIR 192 | $329 | 55dB | 4 |
| SSL SSL2+ | $349 | 62dB | 2 |
| Tascam US-16×08 | $367 | 56dB | 8 |
| Arturia AudioFuse | $899 | 71dB | 4 |
| Apogee ELEMENT 88 | $1,495 | 75dB | 8 |
4. How to choose a Microphone stand?
There’re multiple types of microphone stands to choose from. A boom arm or desk stand will likely be the best option if you plan on recording at your desk. I like boom arms as they don’t take up desk space but desk stands might be easier to use if you move a lot. A floor stand will be required if you plan to record while standing.
You don’t need to spend a lot on a microphone stand, a budget one will suffice most of the time, but a more premium microphone stand will last longer, look better, and be more comfortable to use.
Here’re some good microphone stands at different price points:
| Price | Desk Boom Arm | Floor stand | Desk stand |
| Budget | InnoGear Boom Arm | Amazon Basic Tripod Stand | LyxPro Desk Stand |
| Mid-range | InnoGear Heavy Duty Boom Arm | Gator Tripod Stand | On-Stage Desktop Stand |
| High-end | RODE PSA 1 | Tama Stage Master | Gator Desk Stand |
5. How to choose a Shock mount?
Similarly to a microphone stand, spending lots of money on a shock mount won’t give a significant performance boost, but a more premium option will look better, feel more comfortable to use and might prevent some of the vibrations and handling noise.
A lot of the time, a microphone will come with a shock mount included. In that case, you don’t need to buy one.
Most importantly, when purchasing a shock mount, make sure it has the correct thread for the microphone stand you’re planning to use, they often come with adaptors or you can buy an adaptor yourself. Usually, the thread is either 3/8″ (European) or 5/8″ (USA) and sometimes 1/4″.
Here are some good shock mounts at different price points:
| Price | Shock mount |
| Budget | Btoop Shock Mount With Pop Filter |
| Budget | LyxPro MKS1-B |
| Mid-range | Samson SP01 Spider Shock mount |
| Mid-range | Rode PSM1 Shock Mount |
| High-end | Rycote 44901 Invision USM Shock Mount |
| High-end | Rode SMR Premium Rycote Shock Mount |
6. How to choose an XLR Cable?
Some microphones might come with an XLR cable, but you’ll have to buy one yourself most of the time. I recommend getting XLR cable from a trusted brand to ensure it doesn’t cause any fault. Some respectable brands are JD, Ugreen, Stagg, Neewer, Cable Matters, Hosa, Monoprice, Mogami, Blucoil, LyxPro, and Ebxya. Definitely, there’s more.
You’ll need an XLR cable for each microphone; they should be Male to Female type.
Consider what length of cable you’ll need. Longer cables will cost more, but that’s not always necessary as an unreasonably long cable might get in the way. Before buying consider where you’ll place your microphone and audio interface as an XLR cable connects these two. An audio interface will be connected through a USB connection to the computer.
If you are planning to place an audio interface next to a microphone, then 1m (3ft) XLR cable is your choice, however, 2m (6ft) could be your safer option if you’re going to place it slightly further away. It’s a good practice to have a couple of XLR cables of different lengths available.
For stage use, I recommend getting a lengthy XLR cable at least 5m (15ft) or even longer to avoid sound bleeding from speakers.
You can extend XLR cables by combining them and 2 XLR cables combined probably won’t cause an issue but with each additional cable connection comes an increased risk of fault. Therefore, it’s a bad practice best used only as a last resort.
7. How to treat Room acoustics?
Room acoustics could be even more important than choosing a good microphone. Because no matter how good the microphone is, if there’s lots of background noise and reverb in the room, you’ll not be able to record good-quality audio.
For most of the tasks such as gaming, podcasting, beginner voice over and music you don’t need the perfect recording environment. However, choosing a good recording space with lots of soft surfaces, using acoustic gadgets and adding some additional acoustic treatment could go a long way and for professional work, you’ll probably need a vocal booth.
Here are some acoustic shields that’ll help to deal with the reverb in the room:
| Price | Acoustic Shield |
| ~$25 | Aoke Isolation Shield |
| ~$35 | TroyStudio Vocal Booth |
| ~$60 | Melon Foam Screen |
| ~$75 | Rockville Rockshield |
| ~$100 | Auray ISO-ARMOR-2 |
The problem with these is that they won’t remove reverberance completely and might block your vision, making them unusable if you need to see the screen clearly. Although, in my experience, Melon Foam Screen is small enough and could be used with a bigger PC monitor.
The best way to get rid of reverb for voiceovers is by building a PVC booth from PVC pipes and connectors with thick moving blankets hanging over them.
Alternatively, if you don’t want to build a PVC booth, you can use acoustic foam to treat your room; the thicker, the better. Strategically place them on the wall in front of you because that’s where the sound waves will hit first and use the rest of the foam where you believe the sound will bounce off. Use bass traps in the corners to capture low-end rumble and get an acoustic shield for additional help.
I’ve used 3M double-sided mounting tape to mount acoustic panels before, and they still hang on the wall.