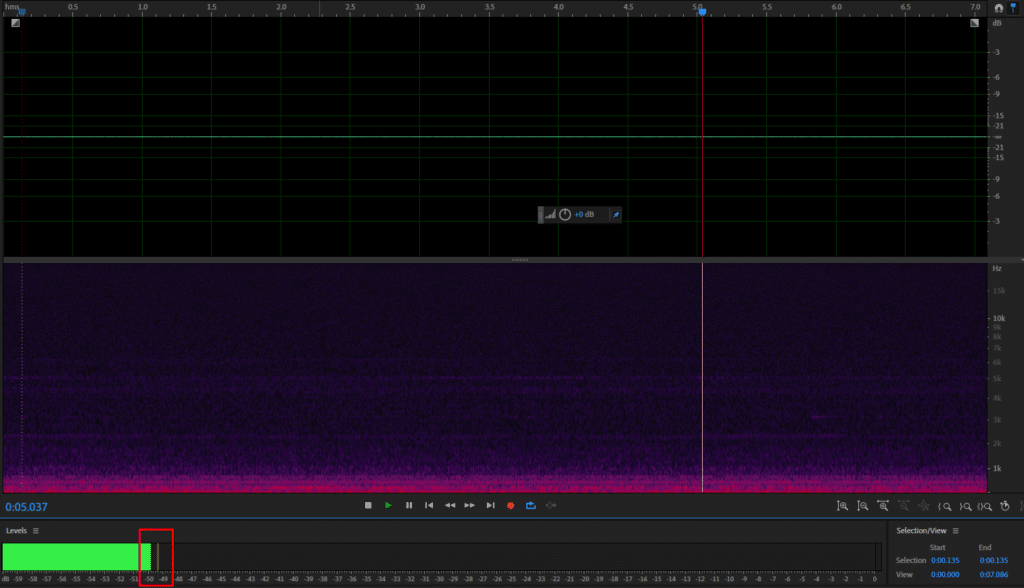
Here’s a step-by-step guide on how to measure noise floor level in Adobe Audition:
- Make sure there are no odd sounds around you
- Record your environment while staying completely quiet
- Observe Levels meter
- Note down the maximum audio level, that’s your noise floor

Noise floor is all the noise that’s not caused by you when recording. Usually, noise floor comes from the surrounding environment, however, it could also be influenced by your audio recording gear or signal interference.
For example, a condenser microphone, especially if it generates loud inherent noise will increase your noise floor. Therefore, noise floor is a combination of a noise surrounding you and the inherent noise that comes from within the microphone or other parts of your audio recording system.
The most common sources of noise are heaters, computer fans, fridges, ventilators, air conditioners, condenser microphones, pre-amps, faulty XLR cables and signal interference.
Measuring noise floor level is important when determining settings in various tools such as noise gate, compressor, noise reduction and more. Also, certain voice over jobs will require you to maintain the noise floor at a certain level.

Pingback: How to Use Noise Gate in Adobe Audition? - Voice Over Tip
Pingback: How to Remove Breaths in Premiere Pro? - Voice Over Tip