You can increase or decrease audio in Volume in Premiere Pro in two ways. One of which is using Premiere Pro’s built-in audio editor. A second way, if you have access to Adobe Audition, you can export your audio to Adobe Audition and any changes you have made within the dedicated audio editor will be implemented in Premiere Pro. Also, this way gives you access to multiple audio editing tools available within Adobe Audition.
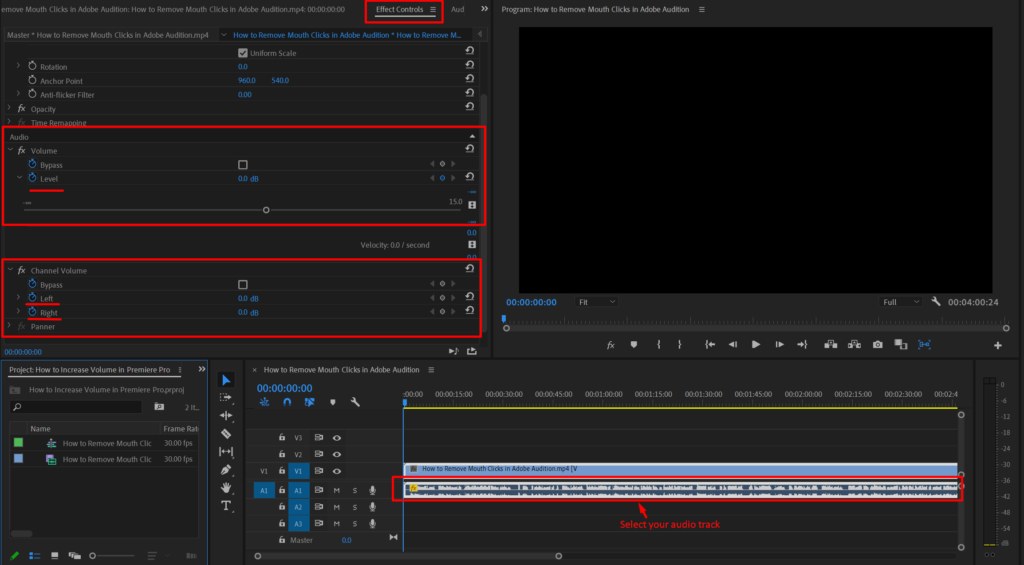
The easiest way to quickly control your video volume is the following:
- Select your audio in a Premiere Pro timeline
- Click Effect Control
- Go to the Audio section in the Effect Control panel
- Adjust Level
If you have a stereo track and want to control the audio volume of different channels, then go to a Channel Volume section in the Effect Control panel and adjust the left and right channels accordingly.

You can also edit your audio volume in Adobe Audition if you have access to it.
Here’s how to edit audio volume in Premiere Pro using Adobe Audition:
- Click the right mouse button on your audio in Premiere Pro timeline
- Choose Edit Clip In Adobe Audition
- Select your audio in Adobe Audition by double clicking on it
- Adjust the audio volume by using Adjust Amplitude wheel
- Click CTRL+S and your audio will automatically be adjusted in Premiere Pro.

