One of the issues that many of us face at some point is how to make your audio sound clean.
After the recording is done, it seems like every sentence is riddled with mouth clicks and plosives and your fridge is heard in the background while the chair is creaking every two seconds.
It is annoying, but you are not out of luck. We can fix it all using good old, trusted Audacity software, which is free just like my tips. I guess that just proves the point that the best things are free.
I am using Audacity software to show how to clean up audio. Still, any audio editing software will have the same tools, so these tips will apply to any audio editing platform.
Audacity download
If you don’t have Audacity installed, you can download it following the link below. Make sure you regularly check whether you have the last version since it often updates and solves many bugs and glitches.
Link: https://www.audacityteam.org/download/
Install noise gate
You will need a noise gate plugin, so get it installed. You can find it here: https://wiki.audacityteam.org/wiki/Nyquist_Effect_Plug-ins#Noise_Gate
If you are unsure how to install it check this article regarding Audacity noise gate.
Background noise
Once we have Audacity and Noise gate plugin installed, we can start with cleaning the audio.
Use spectrogram
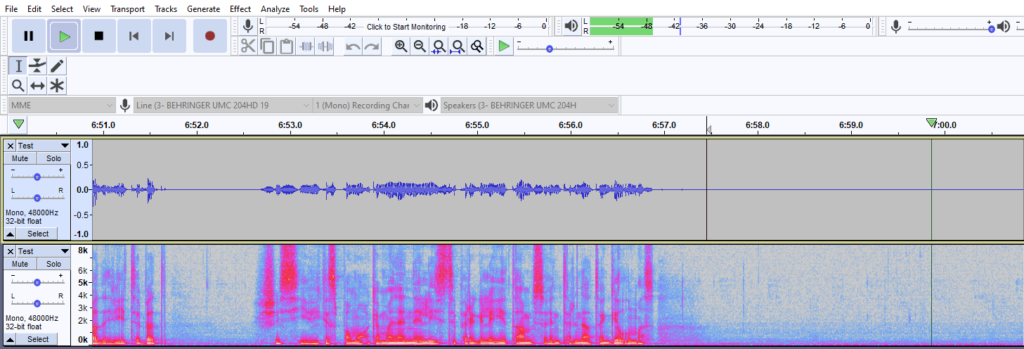
Firstly, you will want to create a copy of your track and go into a spectrogram mode on your copy track.
Using a spectrogram will help you to see better which parts of your audio are noisy.

The background noise may consist of many different sounds, it could be your room tone, a fridge that is creating a buzzing sound, a loud heater or a computer fan.
Ideally, you would want to get rid of the sound source, but if you already have recorded the audio and don’t want to redo it, then there are two ways to deal with the noise.
First, we will try using Noise gate, if that isn’t sufficient, we will use Noise reduction tool.
Noise gate
Noise gate is awesome as it helps to clean audio fast and removes a lot of the manual labor without deteriorating audio quality.
Before using noise gate, you need to measure your room tone. You can do that by staying quiet and recording your room for at least a few seconds.
After you have it recorded, play it back and look at the playback level at the top. You need to check where the blue line lands. In my test recording, it is at around -41dB (look at the picture). That’s useful information that tells you your room tone is somewhere around that level.
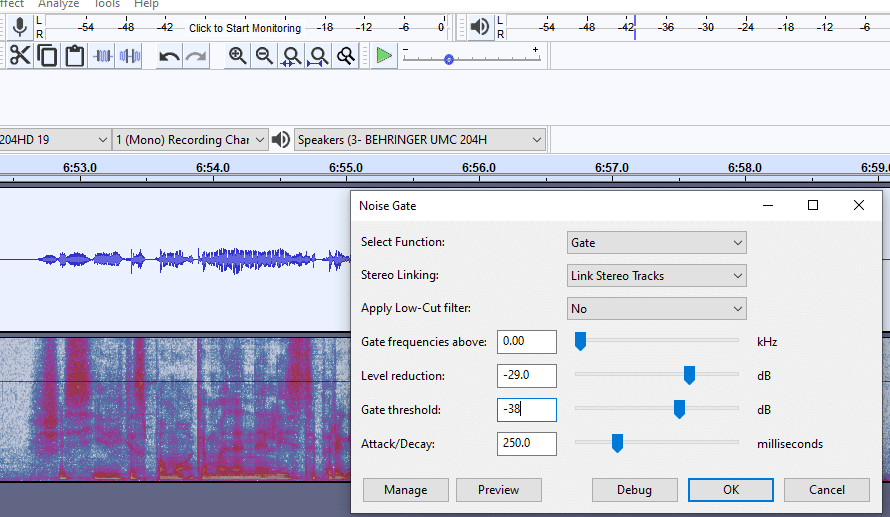
Now, to use noise gate, mark your whole recording and click Effect -> Noise gate… (You must have it installed as it is not included in Audacity by default).
Then you need to set Gate threshold slightly higher than your room tone. Since my room tone was peaking at around -41dB I set my Gate threshold at -38dB.
You can copy the rest of the setting from the picture below.
Here is the before and after:
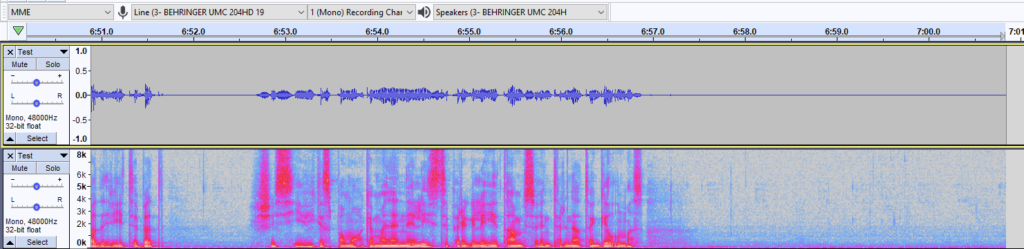

However, noise gate will only remove noise that is in between your vocals. If there is a noticeable background noise that could be heard during you speaking then you will need to be using a noise reduction tool instead.
Noise reduction
Noise reduction tool is not a tool you want to use for every noise issue. Relying too much on noise reduction will create artifacts in your audio and worsen your audio quality. Particularly Audacity noise reduction tool is guilty of that.
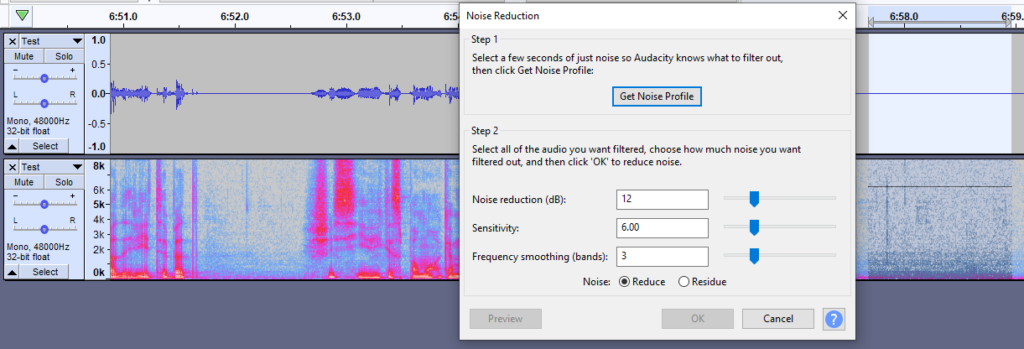
Nevertheless, if the background noise is noticeable noise reduction is an appropriate tool. You will need to select a part of audio where you can hear background noise only, there shouldn’t be any vocals in it.
Then go to Effect -> Noise reduction… and click Get Noise Profile
Audacity will then know that what you selected is noise and should be removed.
Once you have gotten a noise profile, mark a part of your audio where you want noise reduction to be applied or whole audio recording. Then go back to noise reduction tool and click OK.
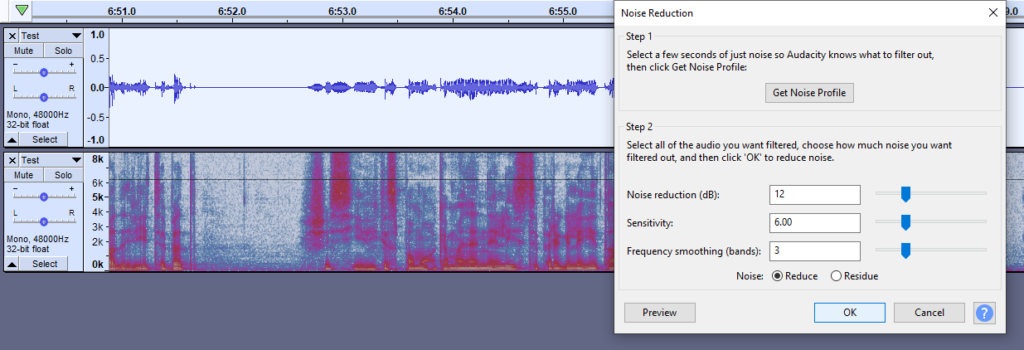
This shall remove any background noise that you previously had. However, if possible try to avoid using noise reduction tool since it deteriorates audio quality.
Remove breaths
Breaths could get annoying, but they are quite easy to deal with. You can try using a noise gate tool to reduce manual labor significantly, but it probably won’t remove all breaths. So, you will have to remove them manually.
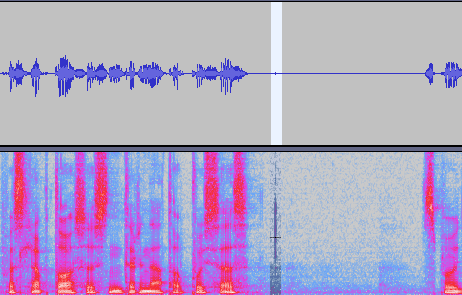
Make sure you are still using a spectrogram; it makes it very easy to spot breaths visually.
You can either playback your whole recording and listen for breaths or look for them in the spectrogram. I like the latter method as it is faster that way.
This right here (in the picture below) is obviously a breath. You don’t want to fully remove it, instead you should aim to attenuate it.

To attenuate breaths you will need to mark the breath and go to Effect -> Amplify… and amplify it by around -15dB, it depends on how loud the breath is.
This action will reduce breath sound by 15dB.
Remove mouth clicks
Mouth clicks are sometimes hard to deal with because they often appear in the middle of the sentence. Still, it is nothing to fret about.
The easiest way to deal with mouth clicks is by selecting your whole recording and going to Effect -> Click removal… and clicking OK. Default settings should work.
However, similar to noise reduction tool, click removal tool may delete some of the wanted frequencies and reduce audio quality. Also, it probably won’t completely remove all of the mouth clicks.
The harder yet more reliable way to deal with mouth clicks is by deleting them manually similarly to how you would delete breaths using Amplify tool.
A mouth click will look something like this in a spectrogram (picture below), and you will need to apply harsher Amplify settings to remove it. Usually from -20dB to -30dB works.
You can also use Click remover effect on your mouth clicks, or you can select a whole audio recording, apply Click remover and then remove remaining mouth clicks manually.
Reduce plosives
Plosives are probably the hardest to deal with, but the correct microphone placement and distancing will prevent any plosives from coming into your microphone.
Nevertheless, if you already have recorded audio and can’t redo it, then you will need to deal with it in software.
You probably won’t be able to completely remove plosives, but you can attenuate it.
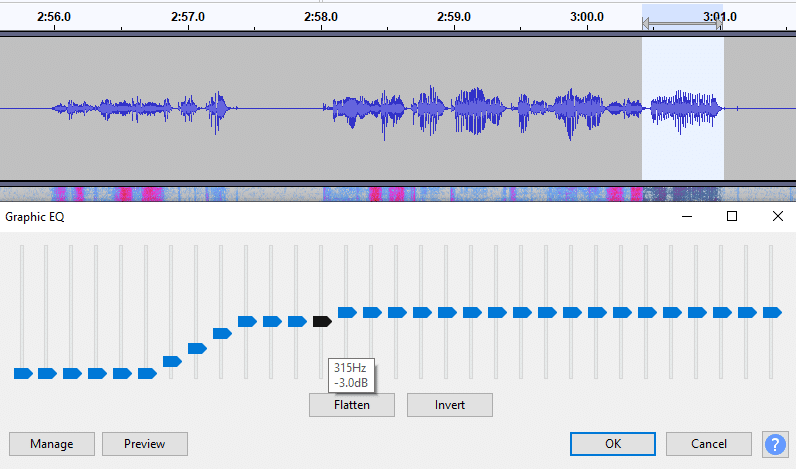
You will need to select parts of audio with plosives and then again use amplify tool to reduce its volume. Don’t overdo it, because you don’t want to completely remove that audio, but slight -5dB or so adjustments will help.
Then you can apply Graphic EQ (Effect -> Graphic EQ…) tool to the same marked audio. You will want to reduce low frequencies. The curve should look something like this (picture below).
If it doesn’t help much, try removing more of the low frequencies.
Pingback: How to Install and Use ACX Check Plugin in Audacity? – Voice Over Tip