If you ever tried editing audio, you might have faced a problem when you wanted your overall audio higher, but amplifying it introduces clipping, which creates distorted and unpleasant sound.
This is a guide on how to increase overall audio volume without clipping. I am going to use Adobe Audition software, but it will work with any other DAW of your choice since these are key tools for any audio editing software.
We will mainly use compression for this task. Compression, as the name suggests, compresses your audio so the quieter parts start sounding louder while louder parts start sounding quieter.
Higher compression will make your audio louder, but will cost you dynamic range which may make it sound weird.
Compression makes your audio sound much more even, however, if used alone it drops audio volume. To bring volume back up we will use the Normalize effect.
Here is how you do it:
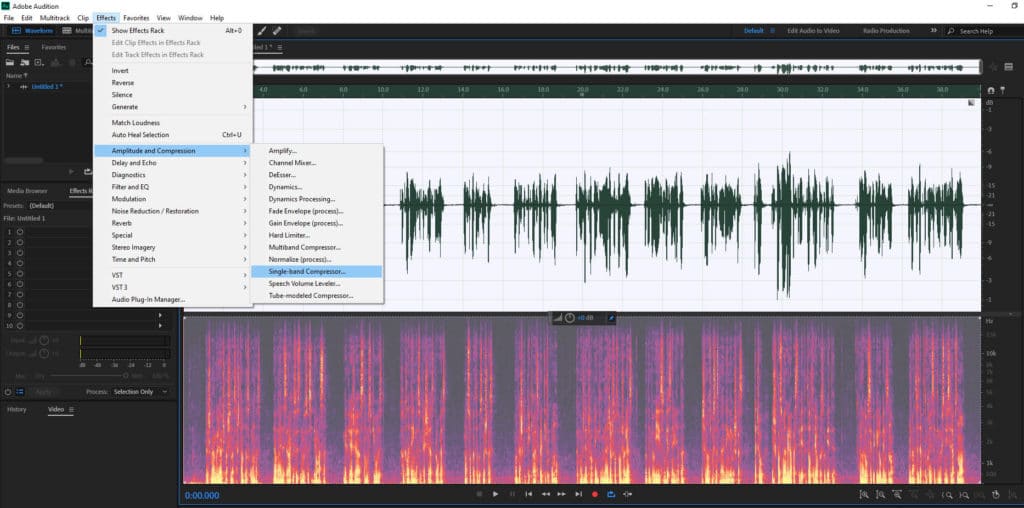
1 step. Effects > Amplitude and Compression > Normalize and set it to 0dB.
2 step. Go to Effects > Amplitude and Compression > Single-Band Compressor
Set the Threshold to -10dB. For higher compression you can set it higher at -9dB or -8dB.
Set ratio to 1:3, for more compression you can set it higher, but anything above 1:4 may sound weird.
Set Attack at 0ms. If you are using Audacity you won’t be able to go below 0.10ms so leave it at that.
Set Release at 100ms. If you are using Audacity, you will notice you are limited to 1s minimum release time, so leave it at that.
Apply compression.
3 step. Again normalize audio to -3dB. If after compression you are planning to use EQ then you may want to normalize to -6dB instead to have some headroom.
This is a crude way of how you can achieve higher volume without introducing clipping.
Now we will look closer at what each parameter determines so you can better understand the process and fine-tune for your audio.
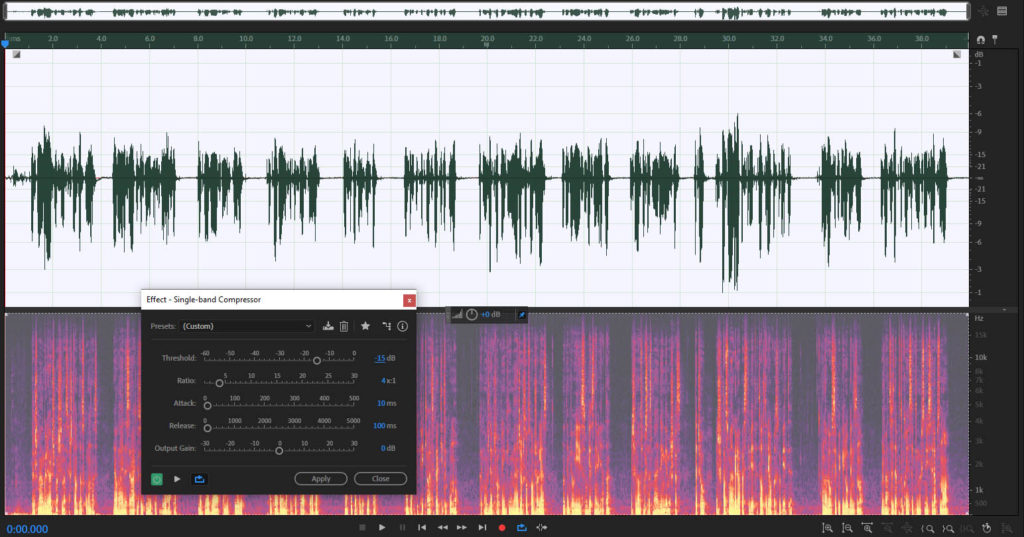
In the compressor menu, you will always see at least 4 parameters: Threshold, Ratio, Release (or Release time), Attack (or Attack time). Adobe Audition also includes Output Gain and Audacity includes Noise Floor parameters, but these are not as important.
On the 2 picture, you can see the audio is peaking at -1dB, it means I can at the most increase my overall audio volume by 1dB before I start clipping and distorting my audio.
To increase my overall audio volume I will have to first decrease the audio volume of the loudest parts so they match with more silent parts and then increase overall audio volume. This is done by the process called compression.

Threshold
Threshold determines the level of audio volume from which volume is reduced. For instance, if I put my threshold at -15dB, it will reduce the audio volume for everything that is above -15dB.
Therefore, the threshold is going to be different for every recording, and choosing the same threshold for every recording will not work the same. That is unless you apply the Normalize effect before compressing audio.
If your audio peaks at -12dB and you set your threshold at -11dB or higher (be aware that we are talking about negative numbers and -11dB is more than -12dB), your threshold will be too high to make any changes to your audio.
Lowering threshold will help to compress your audio and subsequently will allow making it sound louder, but when overdone it results in a squashed voice so don’t overdo it.
You could, however, use Normalize effect to make your audio recordings more similar to one another and then apply the same compression settings.
Ratio
Ratio determines by how much you want your audio above the threshold level reduced. The ratio of 4:1, it will reduce any audio that is above the threshold (in this case -15dB) by 4 times. If it is at -11dB the excess 4dB over the -15dB threshold will be divided by 4 and final audio will be set to -12dB.
Essentially by increasing ratio, you magnify the compression effect. Usually, it is advised not to set ratio any higher than 4:1 and stay in the range of 2:1 to 4:1. Otherwise, if you set it above 4:1 it will sound unnatural.

Attack time
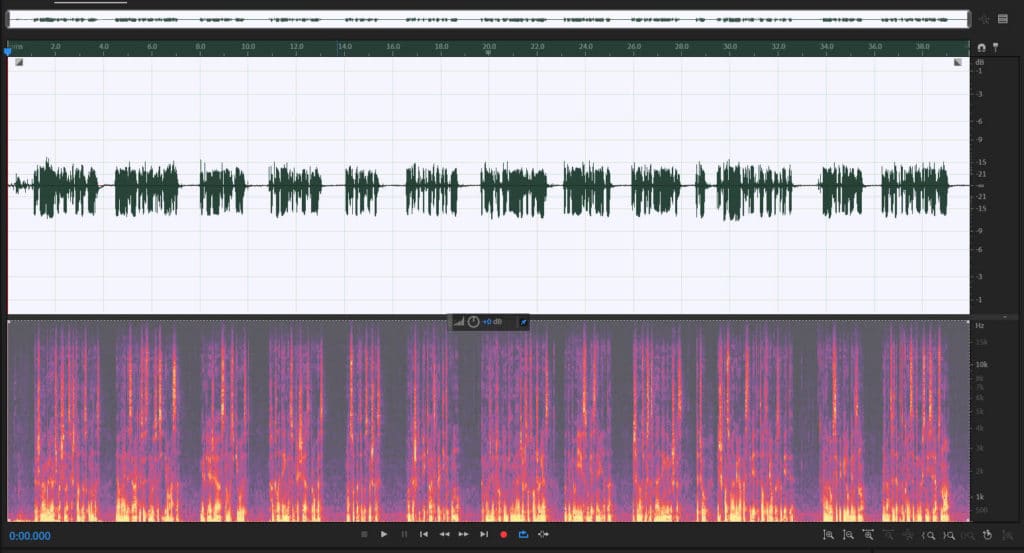
As you can see in 4 picture by applying compression we reduced most of the volume above the -15dB threshold however, there is still one spike left. This is because of the Attack set at 10 ms.
Attack (or Attack time) determines how long it takes for the compression to finish compressing. If you set your Attack time to anything above 0, compression becomes a gradual process and rather than instantly applying 4:1 compression ratio it increases the ratio gradually over the 10ms lapse.
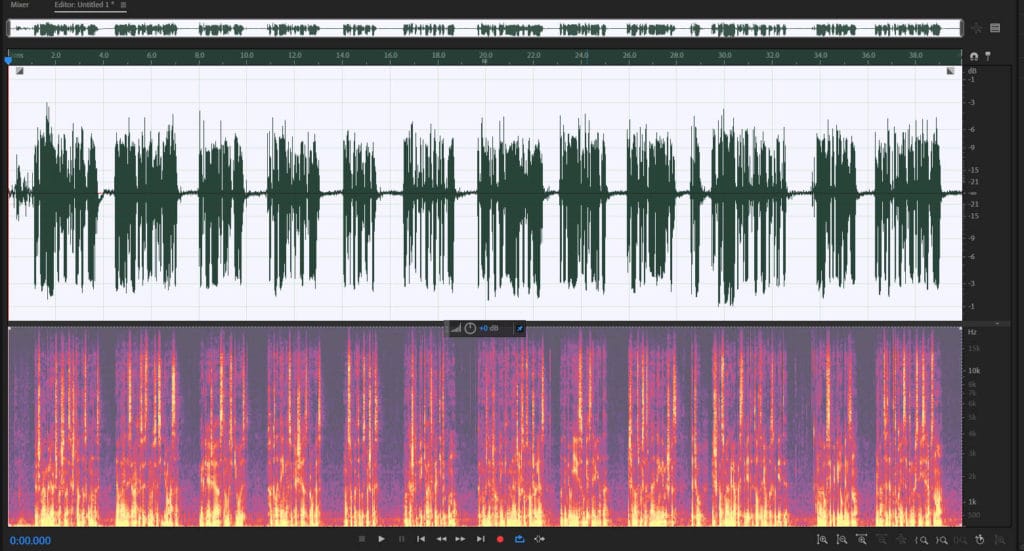
Because of that, in 4 picture example after applying compression one audio spike was left out and if I were to try to increase my overall audio volume it would get in my way. Changing Attack time to 0ms fixes the problem (5-6 pictures).

Release time
Release time works similar to Attack time, except instead of gradually introducing compression it gradually releases it. Which means once your audio goes bellow set threshold it starts to gradually lower compression ratio till it is 1:1.
For example, if Release time is set to 100ms, it will take 100ms after going below the threshold to stop applying compression. Adding some release time will make your audio sound a bit more natural and less abrupt.
Normalize
After compressing audio you end up with a quieter mix. To bring the volume up you will be using Normalize effect.
Also, you may want to consider using Normalize before applying compression to get more consistent results.
Normalizing your audio increases overall audio volume. Setting normalization to -1dB will set the highest peak to -1dB and the rest of the audio will increase accordingly.
For example, if your loudest part is currently at -9dB and your lowest part is at -60dB, normalizing to -2dB will increase your loudest part to -2dB and your quietest part to -53dB. Your overall audio volume will increase by 7dB. Remember not to go above 0dB as it will introduce clipping.
Tips and observations
If you are planning to use Equalizer leave some headroom. Otherwise, you might introduce clipping when using it. Normalizing to -6dB before applying EQ should be alright unless you plan to go crazy with it.
Keep in mind that you can always use Normalize effect again after EQ to bring your audio levels up. Just don’t make a mistake of compressing your audio after applying EQ. If you do so, you will distort whatever you have done with EQ.
After normalizing you have your final audio. You can compare 7 picture to 1 picture. The former is much more consistent, most peaks land in -3dB to -1dB range. While in the 1 picture peaks are all over the place.
We essentially have not increased its maximum volume, we just made quieter parts louder by compressing louder parts and then increasing overall audio volume.
You will notice your audio will sound much louder yet still remain undistorted. Just be aware to not over-compress your audio as it will make it sound weird. Audio needs some dynamic range to not sound monotonic and boring.
Hard Limiter
If after normalizing you still want to add some volume, you can try using Hard Limiter, which is a compressor with infinite ratio. Hard Limiter will cut anything that is above a set threshold.
If you see some wild peaks you can apply Hard Limiter to reduce them by a few dB and apply normalization again to bring up the level. Just use it sparingly.
Pingback: How to Record High Quality Audio? – Voice Over Tip