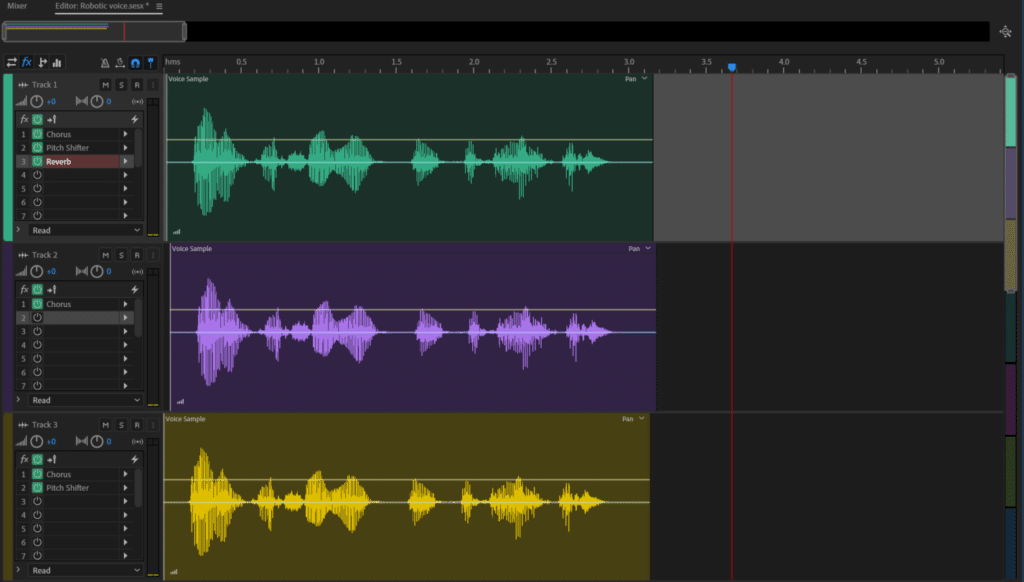
You can create a robotic voice in Adobe Audition by multiplying your audio track into three, adding some disparity in their timelines and applying multiple effects such as Chorus, Pitch Shifter and Reverb. The key here is to make it sound like multiple voices speaking at the same time with slight differences.
To create Robotic voice in Adobe Audition follow these steps:
- Open multitrack editor
- Insert your track
- Multiply the track into three
- Move two of the tracks slightly so that there’s a minor disparity between the tracks in a timeline
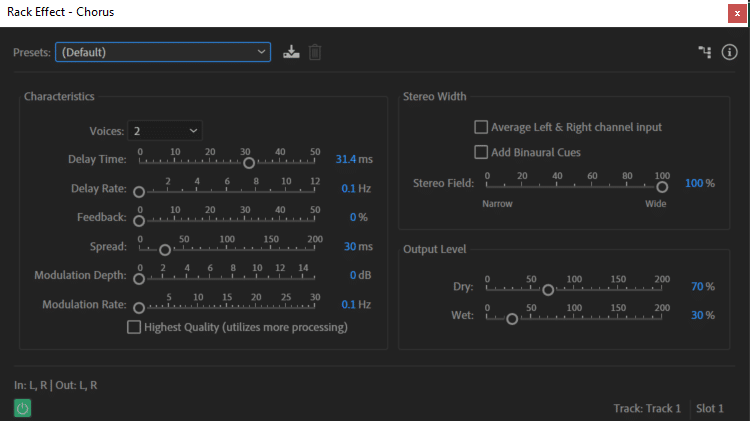
- Apply Chorus (Effects->Modulation->Chorus) effect onto each track
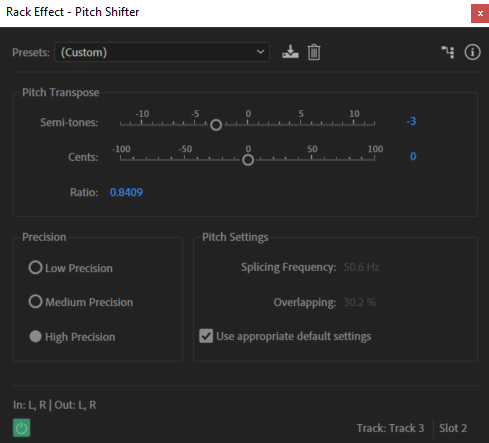
- Using Pitch Shifter (Effects->Time and Pitch->Pitch Shifter) effect to boost the first track by up to 5 semitones and reduce the third track by up to 10 semitones
- Apply Reverb (Effects->Reverb->Reverb) effect onto the first track

Original audio:
Audio after applying effects in Adobe Audition to make it sound robotic:
You can copy the settings I’ve used but there are no limits to how to achieve a robotic voice in Audition. You can play around and use harsher or lighter settings to create the perfect robotic voice for yourself.