Audacity has quite a few tools to remove background noise: Graphic EQ, Noise Reduction, Noise Gate, Click removal, Spectral edit parametric EQ. Also, sometimes you’re required to clean up audio manually and Audacity is perfect for that.
You can use Graphic EQ to remove some of the low-end noise. Noise Reduction tool is a useful tool for any kind of noise and is very universal although not recommended as a primary option. Noise gate has to be installed as an external plugin but is a very capable tool that’ll allow to quickly edit your audio and remove lots of unwanted background noise with a few clicks. Click remover will remove odd clicking noise such as a keyboard or mouth clicks. Finally, Spectral edit parametric EQ is a powerful tool capable of removing equipment related background noise.
Remove background noise with Equalizer
When removing background noise it’s important to first apply tools that won’t lower your audio quality and Graphic EQ is one of such tools. Using Graphic EQ you can get rid of certain frequencies within your audio recording that might be responsible for background noise.
Generally, with equalizer, you’ll be getting rid of some of the lower-end frequencies, which aren’t even present in a human voice. This way you’re not risking altering your voice but you’ll be getting some of the low-end rumble cut from the recording.
Graphic EQ won’t immediately fix all the background issues but it improves your audio slightly without harming it.
Here’s how to remove background noise with Graphic EQ in Audacity:
- Select your audio track by double-clicking on it
- Go to Effect->Graphic EQ
- For male vocals remove frequencies up to 80Hz and for female vocals remove frequencies up to 100Hz
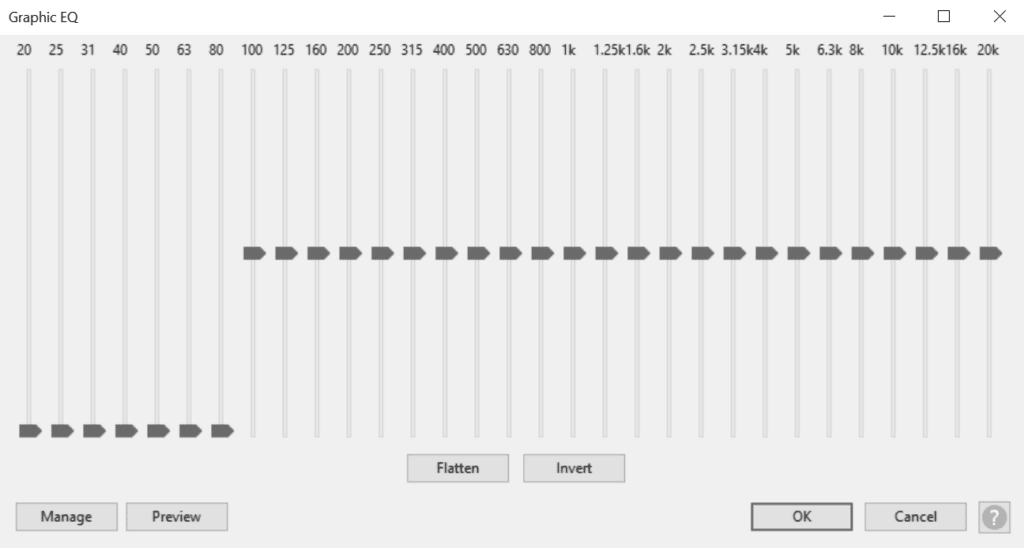
If you have a deeper voice you might want to remove only up to 60Hz, but for most males, up to 80Hz will be a sweet spot.
Remove equipment noise with Spectral edit parametric EQ
Sometimes when you have a hissing noise in your audio you can get rid of it by using Spectral edit parametric EQ and targeting the frequencies at which the noise is. A lot of the time hissing noise is limited to a very narrow amplitude of frequencies and removing those frequencies will get rid of the noise without affecting your vocals too much.
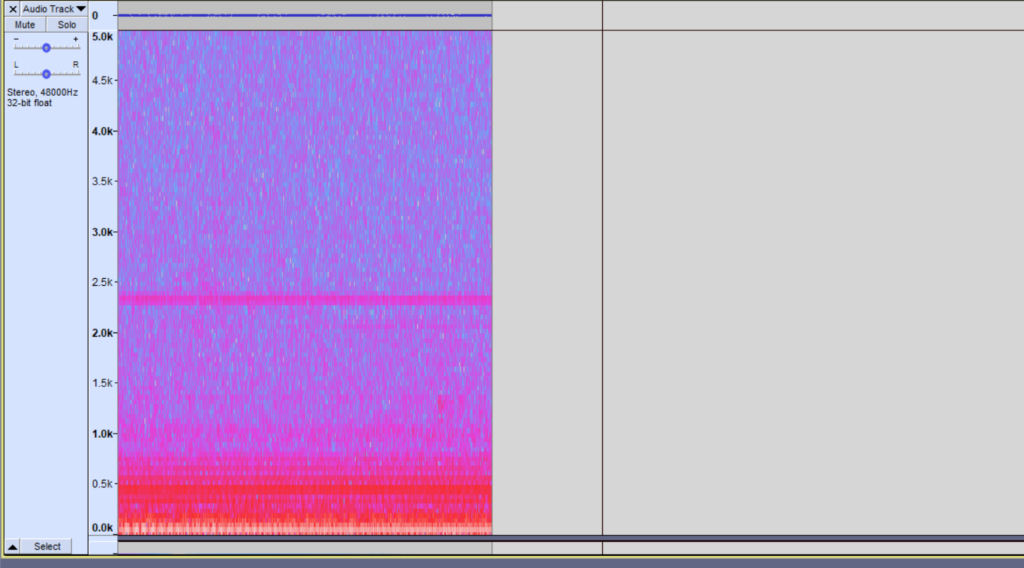
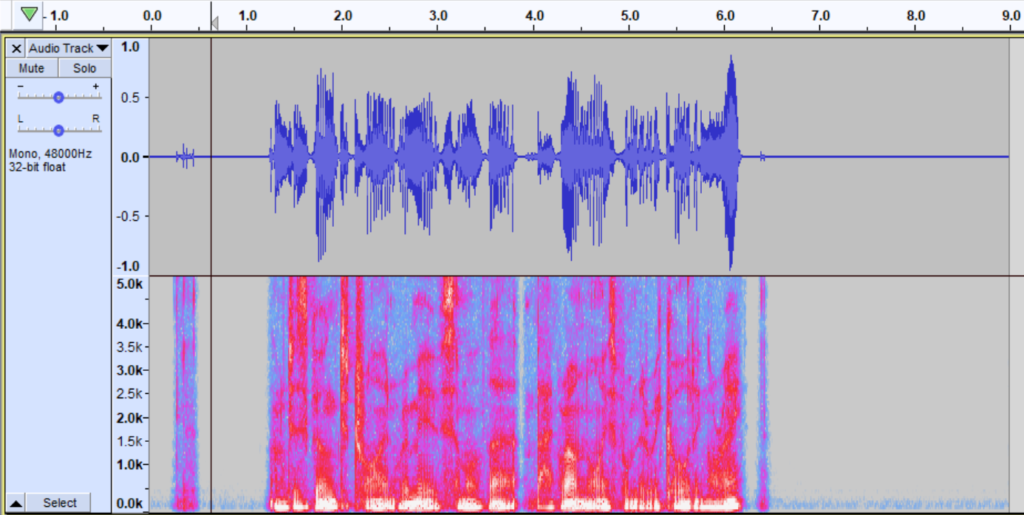
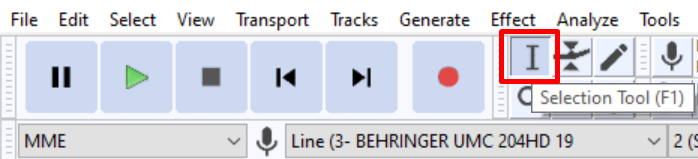
To spot such noise open the spectrogram and expand it as much as possible so that you have a better view of the frequencies. Using the Selection tool (F1) click on the spectrogram and select unwanted frequencies, they should look like a line in your spectrogram. When selecting frequencies try to be as accurate as possible, you don’t want to remove any additional frequencies besides those that cause the noise.
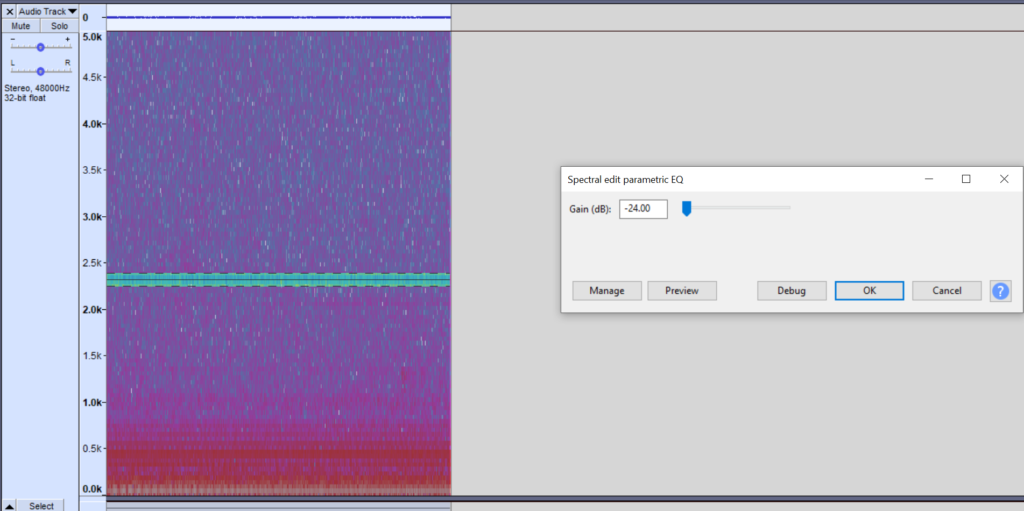
Once you’ve selected the frequencies causing the background noise, remove them by using Spectral edit parametric EQ:
- Select the frequencies causing noise with Selection tool (F1)
- Go to Effect->Spectral edit parametric EQ
- Click OK
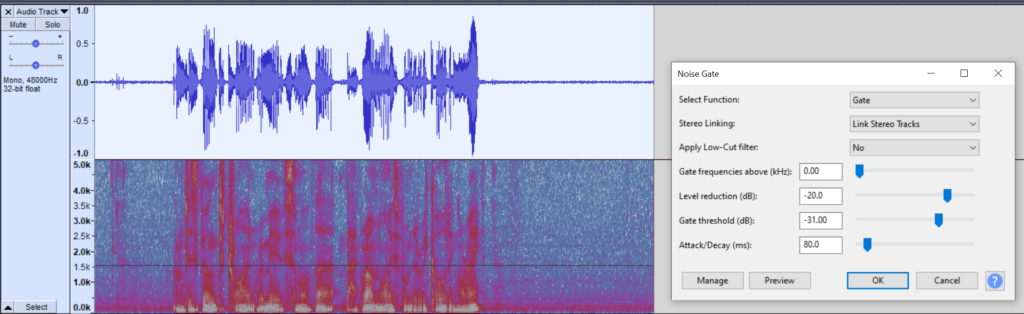
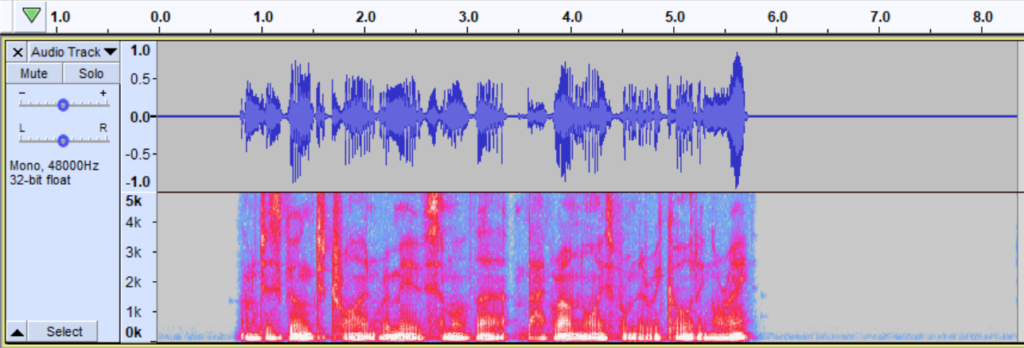
In the example below, you can spot the noise at around the 2.3kHz to 2.4kHz range. It’s the noise from pre-amps.
This method is very useful if you have any sort of noise from your equipment. Sometimes cheaper USB microphones have this inherent noise or pre-amps if you use them at high gain levels. Other times you can experience such noise from a heater, air conditioner or a fridge.
Remove background noise with Noise Gate
Audacity doesn’t have a built-in noise gate but you can download Nyquist noise gate if you don’t already have it.
Similarly to Graphic EQ, correctly using noise gate in Audacity won’t diminish your audio quality but can remove a lot of the background noise and it’s probably the best tool for that.
Here’s how to remove background noise with a Noise Gate in Audacity:
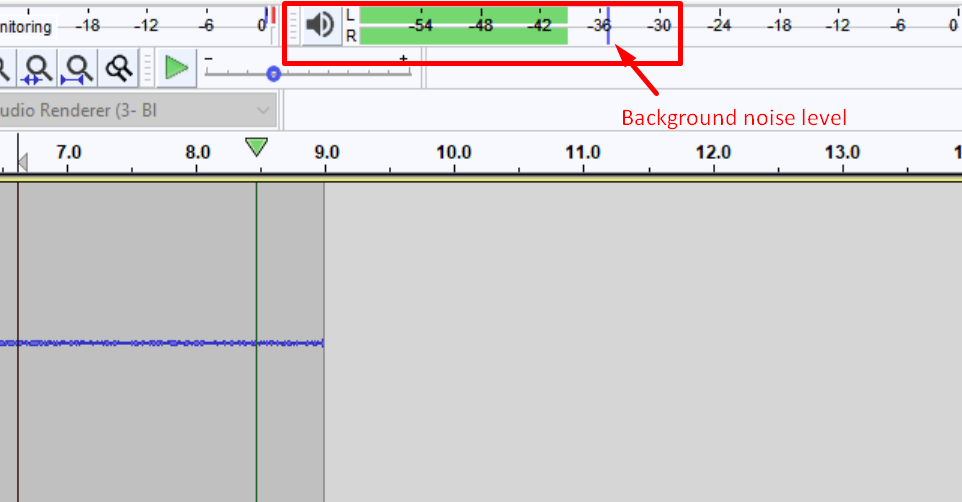
- Play the quiet part of your recording
- Look at the playback level meter and mark down the maximum audio level on it that’s indicated by the blue line
- Select your audio track by double-clicking on it
- Go to Effect->Noise Gate
- Set the Gate threshold (dB) about 5dB above the background noise level you measured before
- Click ok and repeat if required
Remove clicking noise with Click remover
Click remover deals with odd clicks in your audio recording. Usually, it’s clicking on the keyboard or mouth clicks created by the tongue touching the roof of the mouth but it could be anything.
The effect is quite harmless as it detects clicks very well, hence you don’t need to worry about it ruining frequencies of your vocals where clicks aren’t apparent.
Here’s how to apply Audacity’s click remover:
- Select your audio track
- Go to Effect->Click Removal
- Use the default settings and click OK.
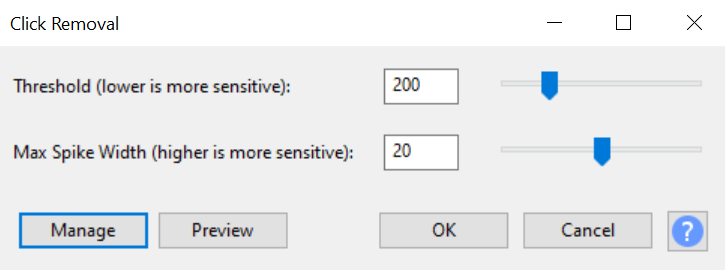
The effect will reduce some keyboard noise from your background if there is any and it’ll deal with noise from fidgeting in your chair, mouth clicks etc.
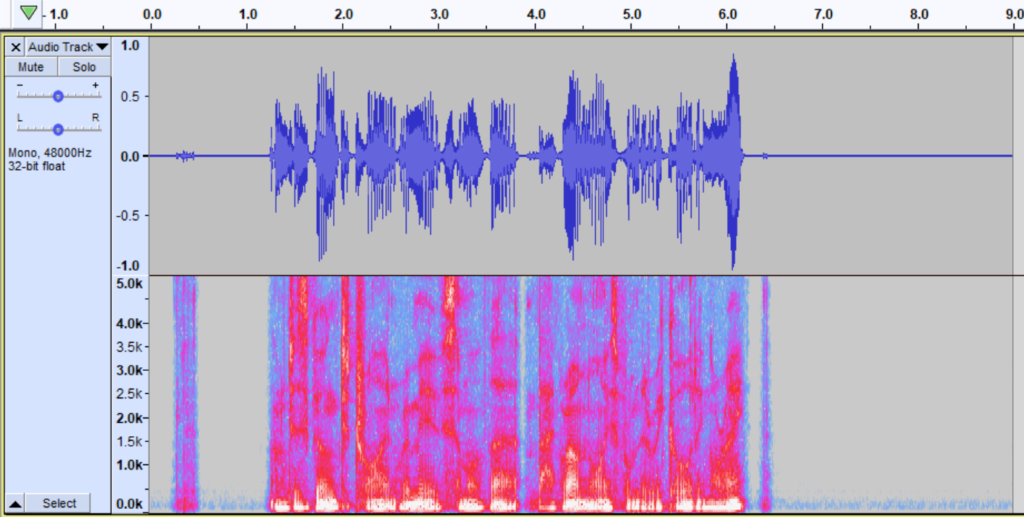
Remove background noise manually
After I’ve applied the aforementioned tools to deal with the background noise I like to clean up my audio manually from any leftover background noise. For manual clean up, I would use a selection tool (F1) and ‘Delete’ button on the keyboard.
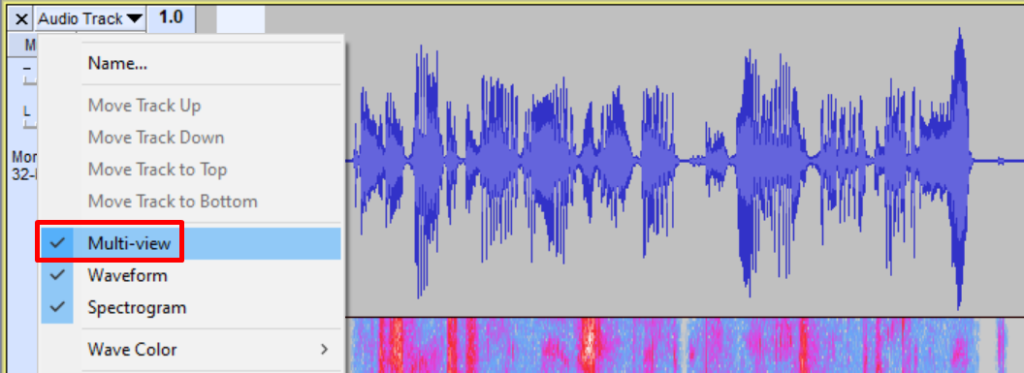
Select any apparent noise using the selection tool (F1) which is also a default tool in Audacity and click delete. Sometimes you can’t notice odd noises in your audio just by looking at the waveform, therefore, I like to use multi-view mode where both waveform and spectrogram are visible.
Remove background noise with Noise Reduction tool
If you’re still not happy about the background noise in your audio after applying all the previously mentioned tools, the Noise Reduction tool is your last option. It does the most damage to your audio quality and will probably introduce some audio artifacts but if the background noise is very harsh then you might want to use this effective tool. It’s good in those situations where the noise overlaps with your vocals and you can’t get rid of it by using noise gate.
Here’s how to apply Noise Reduction tool in Audacity:
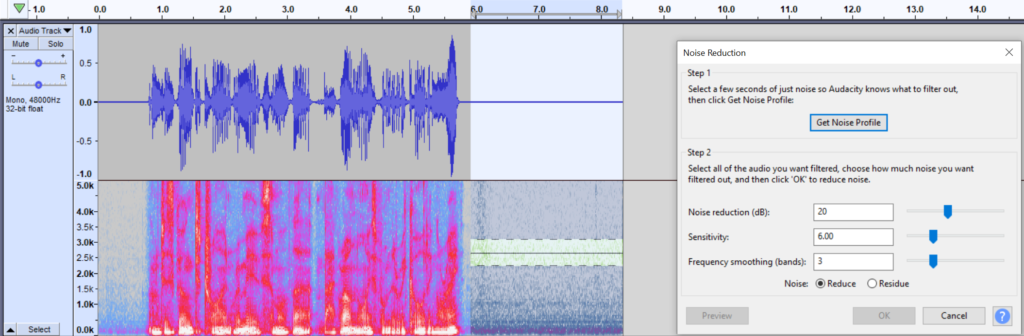
- Select the quiet part of your audio recording with the background noise in it
- Go to Effect->Noise Reduction
- Click Get Noise Profile
- Select your whole audio recording
- Open Noise Reduction effect again and click ok
You can increase sensitivity if you feel like there’s more noise to be removed from your recording, however, default settings usually are enough.
You can read about the quietest condenser microphones here and if you plan to build your own recording setup with minimum background noise I recommend following this guide.