Cave walls restrict audio within a cave, adding a lot of reverb to the sound you hear. Therefore, you’ll be using a reverb effect to achieve a cave sound quality in Adobe Audition. The reverb effect in Adobe Audition is quite versatile and allows you to adjust the audio according to the size and shape of the cave.
Inserting the silent part at the end of your audio track will prevent your audio from truncating where the audio clip ends.
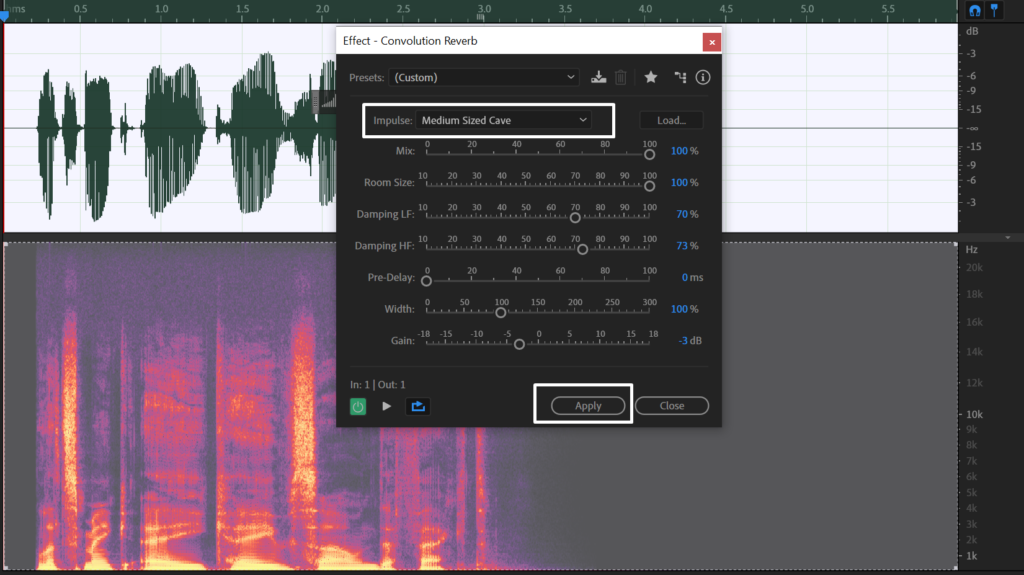
Here’s a step-by-step guide on how to create a cave sound effect in Adobe Audition:
- Click ALT+→ arrow to move to the end of your audio track
- Go to Edit->Insert->Silence and add at least 10s of silence at the end of your track
- Select your audio recording
- Go to Effects->Reverb->Convolution Reverb
- Set the Impulse at Medium Sized Cave and adjust parameters if needed
- Click apply.
You may want to alter the default settings to tune them to your liking. To make it sound like you’re in an even bigger cave, choose a Massive Cavern impulse instead of the Medium Sized Cave.
If you want to make the cave sound smaller and more intimate, lower the Room Size. That way, everything will sound much tighter and closer.
Reverb is mostly caused by lower-end frequencies as they move further compared to higher frequencies. Therefore, you can increase or diminish the reverb significantly by controlling the Damping LF (LF=Low Frequencies) parameter. Increasing Damping LF will diminish reverb while lowering the parameter will enhance the reverb and expand the perceived space.
No effect:
Default Convolution Reverb with Medium Sized Cave impulse:
Convolution Reverb with Medium Sized Cave and 85% LF Damping: