Breathing noise is caused by air puffs coming from your mouth and hitting the microphone. Since the diaphragm within the microphone is sensitive that causes a loud distorted sound. However, breathing noise can be removed using a noise gate, amplify or noise reduction tools within Audacity.

How to remove breaths with a Noise gate in Audacity?
Here’s an article on how to install noise gate plugin in Audacity.
Noise gate is probably the best tool to quickly eliminate most of the breaths from your recording, it’s quick and won’t reduce audio quality. However, noise gate is incapable to remove breaths that overlap with words. Therefore, noise gate will only remove breaths from in between words. Luckily, that’s where breaths usually appear.
Here’s how to remove breaths with a noise gate in Audacity:
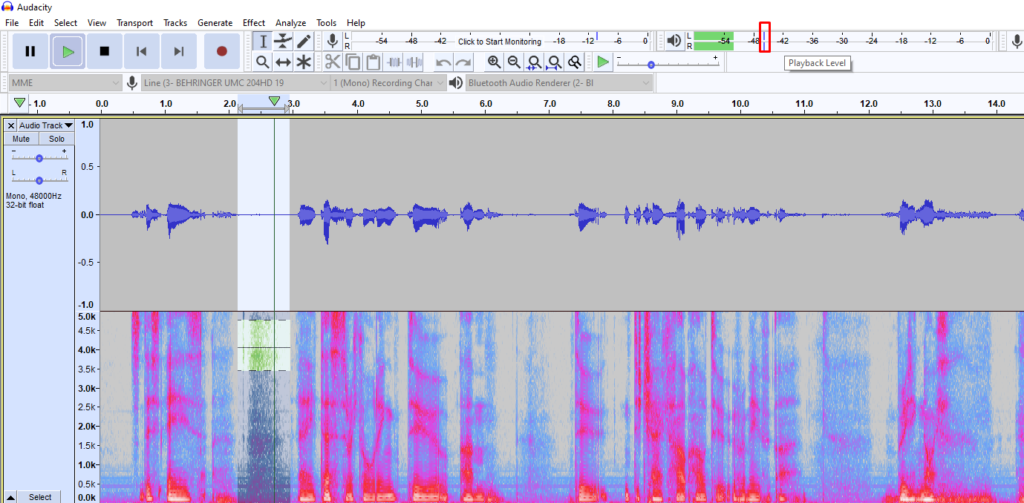
- Measure how loud your breaths are using a Playback Level meter at the top.
- Select your whole recording
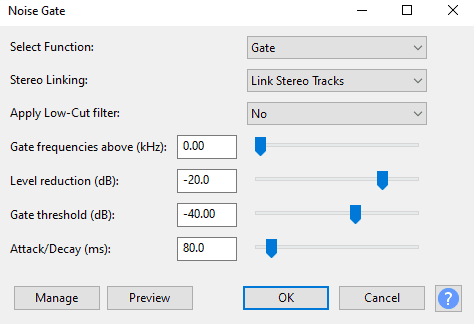
- Go to Effect -> Noise Gate
- Set the Gate threshold to ~5dB above the volume of your breath
- Set Attack/Decay to 80ms and Level reduction to around -20dB, click OK
How to remove breaths using Noise reduction in Audacity?
Removing with noise reduction is extremely fast and it’ll remove most of the breaths, even if they are in the middle of a sentence. However noise reduction tool will remove some of the frequencies from your vocals which could introduce audio artefacts and slightly reduce audio quality. It might be better to stick with noise gate and amplify tools if breaths are only in between words.
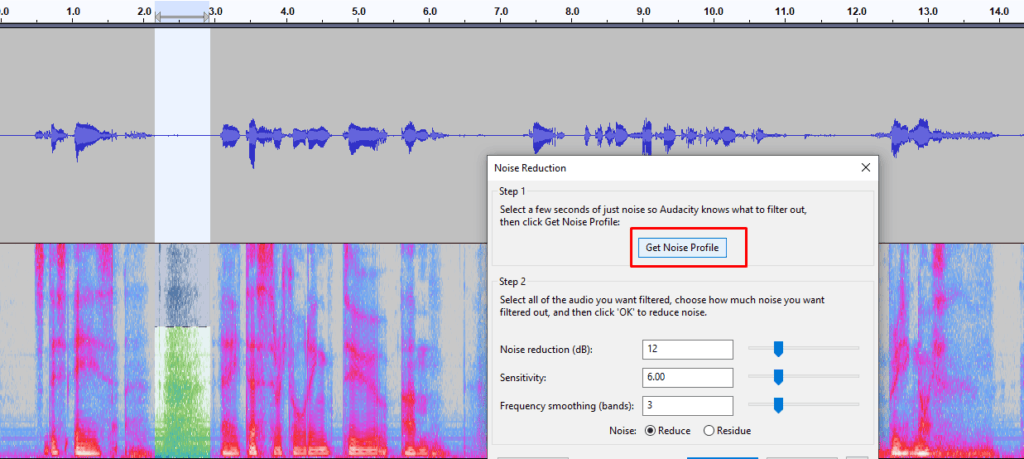
- Select a breath within your recording
- Go to effect -> Noise reduction
- Get Noise Profile
- Select the whole recording
- Open Noise reduction again
- Set Noise reduction to 20 dB and click OK.

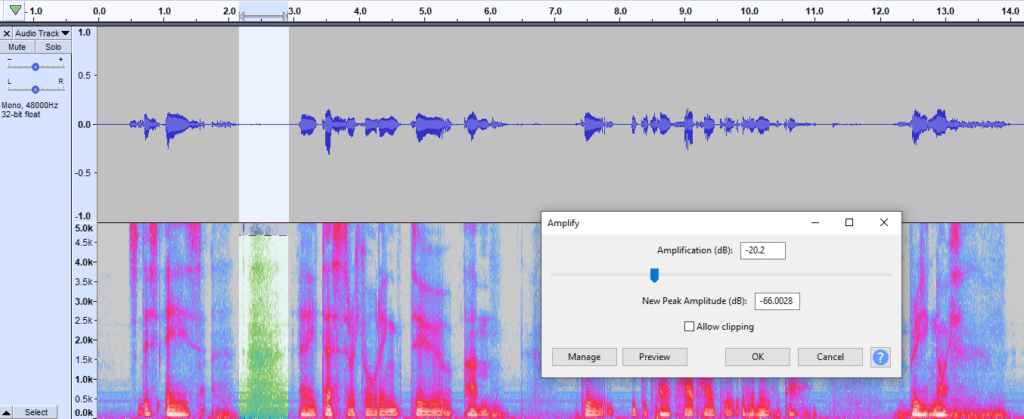
How to remove breaths using an Amplify effect in Audacity?
You can remove breathing noise from your recording using an Amplify effect on every breath. It’s a tedious work if you have a long recording, but works perfectly fine for shorter ones. Moreover, amplify effect can be used to clean up audio for when there are some breaths left after applying noise gate or noise reduction.
Here’s how to remove breaths with amplify effect:
- Select a breath
- Go to Effect – > Amplify
- Set Amplification to around -20 dB or what seems appropriate for your recording
- Click OK
- Repeat the same for each breath
You can also make removing breaths with Amplify effect faster by adding a keyboard shortcut to Amplify effect by going to Edit -> Preference -> Keyboard -> Search ‘Amplify’ -> Insert <letter> -> Click set

You can read how to avoid breathing noise in this article.
Pingback: How to Prevent and Remove Breaths from Audio Recordings? - Voice Over Tip