ACX is a platform where voice actors have a chance to audition for narrating audiobooks and have their work published on Audible. ACX is strict with audio quality and will give you a set of requirements that your audiobook recording must pass. Luckily, it’s not too hard to meet their requirements if you know what to do.
You can check whether your audio meets the first three requirements mentioned below using the ACX Check plugin.
The main requirements are:
- Noise floor below -60dB and above -90dB
- RMS between -23dB and -18dB
- Peak values below -3dB
- Sample rate of 44.1kHz
- MP3 file format with a constant bit rate of 192kbps or higher
- Only mono or stereo recordings (preferably mono)
- 5s of room tone at the beginning and end of each audio file
- Consistent audio levels
- Audio free of plosives, pops, background noise, mouth and mouse clicks
- One chapter per audio file
Sample Rate
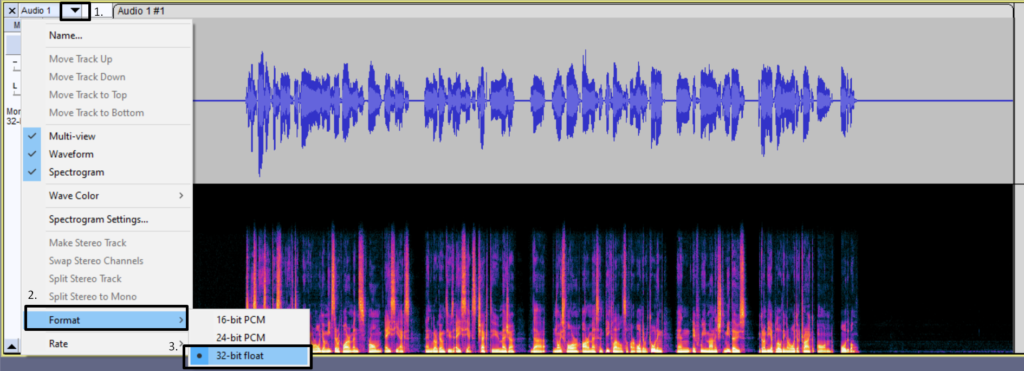
You can change your Default and Project Sample Rate to 44.1kHz by going to Edit->Preferences->Audio Settings. Also, once you are here, change your Default Sample Format to 32-bit float.
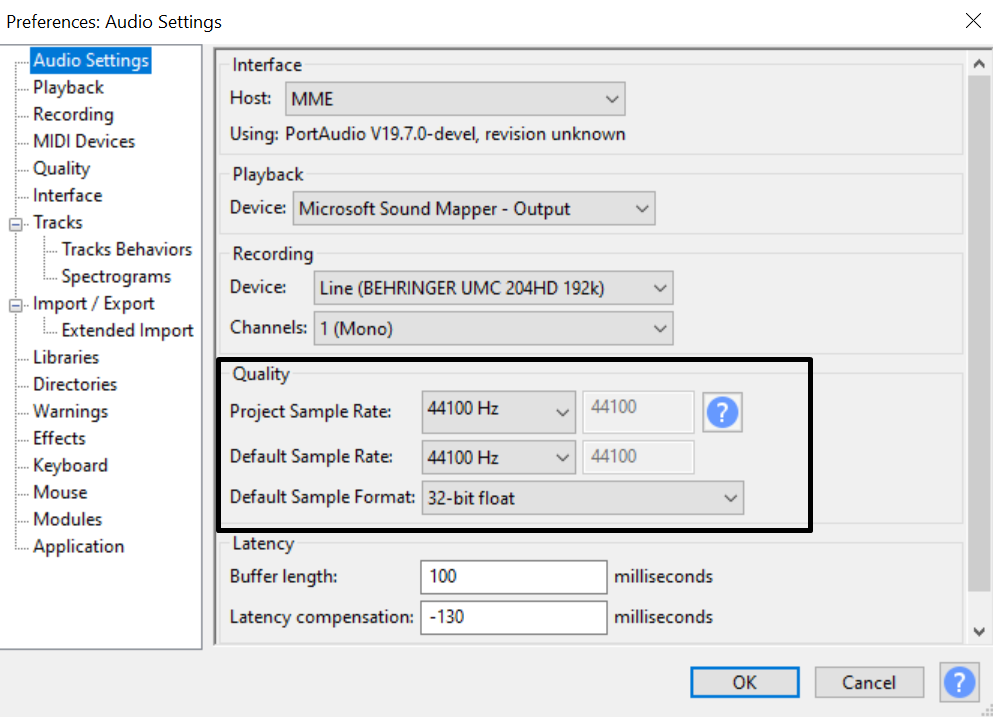
You can check whether you’re working with correct Sample Rate by looking at your audio track settings next to it:

Setting your noise floor below -60dB
As per usual, you’ll want to deal with noise floor first so that you have clean audio to work with. The best way to do that is by recording clean audio. When recording, go the furthest away possible from noise sources such as windows, furnace, computer fans, fridge, etc. If you’re recording next to a noisy computer, you can try using Fan Control to temporarily reduce fan speed and fan noise. This app has been a lifesaver for me.
Also, you can try to set your gain levels lower and speak louder into the microphone in order to have a better signal to noise ratio.
ACX doesn’t specify that on their website, however, on some occasions using ACX check, I’ve received warnings that my noise floor is too low and sounds unnatural. You’ll get this message when your noise floor goes below -90dB.
Equalizer
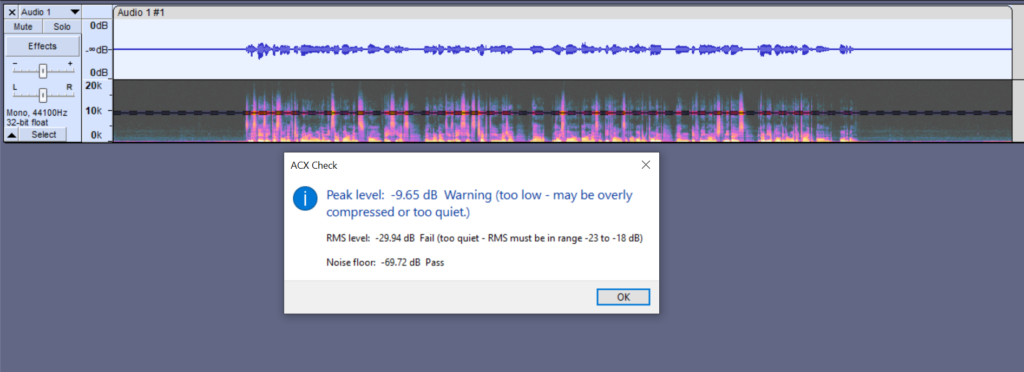
Looking at my ACX Check results above, my noise floor currently meets the requirements. However, my RMS and Peak level are way to low, which means that I’ll have to raise my audio levels and that will increase my noise floor, possibly making it too high. The first tool I like to use to reduce my noise floor is equalizer and Audacity has a few built-in equalizers (Graphic EQ and Filter Curve EQ).
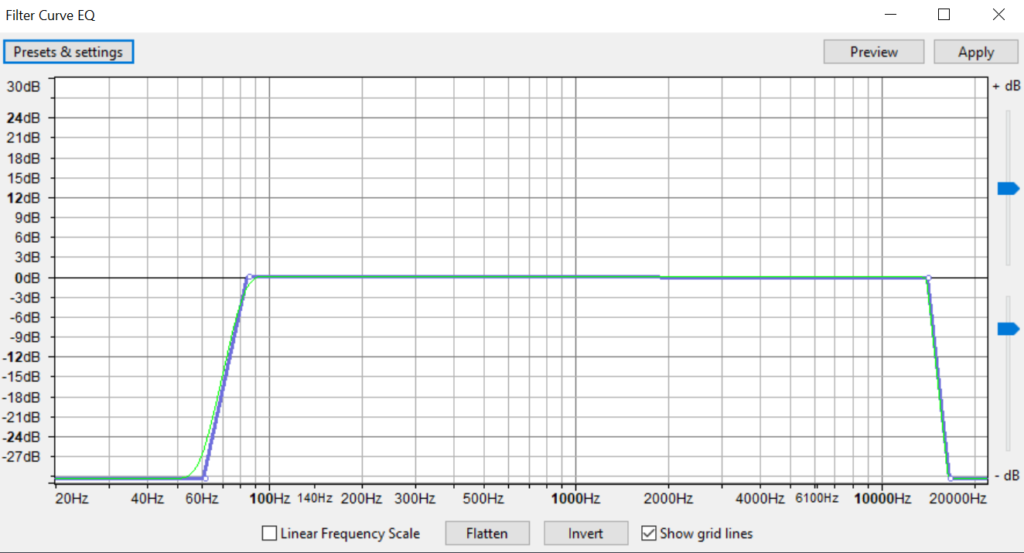
Pick any EQ you like and attenuate frequencies below 80Hz and above 16kHz range as shown in the example below. This is the cleanest and best way to reduce your noise floor without affecting your vocals. In this example, using EQ reduced my noise floor from -69.72dB to -75.18dB which is significant.
Noise gate
If you had a clean recording, applying EQ might be sufficient to deal with noise floor and you might not need any more adjustments. However, if at this point your noise floor is higher than -80dB you probably want to apply noise gate effect to further reduce noise floor and this will help you deal with the majority of breaths as well.
Keep in mind that these settings won’t necessary be the same for everyone and is just a reference point for guidance.
In this particular case I applied the following settings:
- Gate threshold (dB): -40dB
- Level reduction (dB): -7dB
- Attack (ms): 1
- Hold (ms): 50
- Decay (ms): 100
Among all of noise gate parameters adjusting level reduction will give the most significant impact to your noise floor. In any case, I would keep level reduction quite mild because noise gate will only work on parts of your audio where you aren’t speaking. Due to that, if you aggressively reduce noise floor, noise gate effect will be very audible in between your sentences.

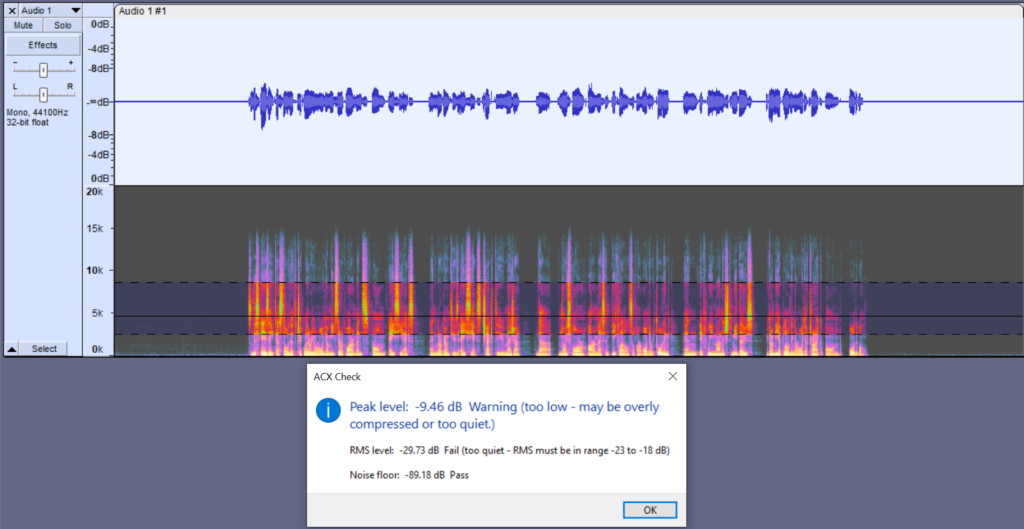
After applying both EQ and noise gate the noise floor has been reduced to -89dB.
Setting RMS and Peak Values
Before working on audio levels make sure your audio track Format is 32-bit float. This will prevent you from losing audio quality if at any point your audio goes above 0dB.
RMS represents the average overall loudness of your audio. Peak Level is determined by the loudest part of your audio. Both of these measurements are related as we’re talking about audio levels.
To reach appropriate RMS, we’ll use Normalize and Compressor effects and to reach required Peak Level, you’ll use Normalize effect. Both Normalize and Compressor affect RMS and Peak Level.
Normalize
We’ll apply Normalize effect first, as in some cases, this might be sufficient to reach appropriate RMS and Peak Level. In Normalize effect, set your peak amplitude to -3dB. This way you’ll meet Peak Level requirement but in some rare cases, if your audio has very consistent audio levels, you might end up with RMS in between -23dB and -18dB, essentially meeting ACX’s requirements.
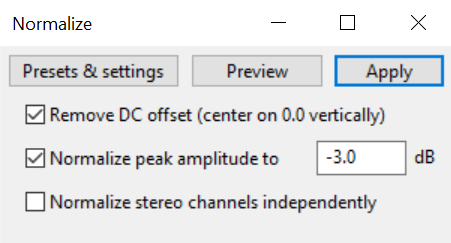
In this particular example, after applying Normalize effect, my RMS ended up at -23.27dB, which is slightly too low for ACX. Hence, some compression is required and this will probably be the case for you as well.
Compressor
Compressor works by making the loudest parts of your audio recording quieter. By using compressor we reduce dynamic range and increase the consistency of audio levels. Since you lose protruding peaks when applying compression, you can now again apply Normalize effect, this way your quieter parts will become louder and you’ll bring back your peak audio levels to -3dB.
Before applying compressor:

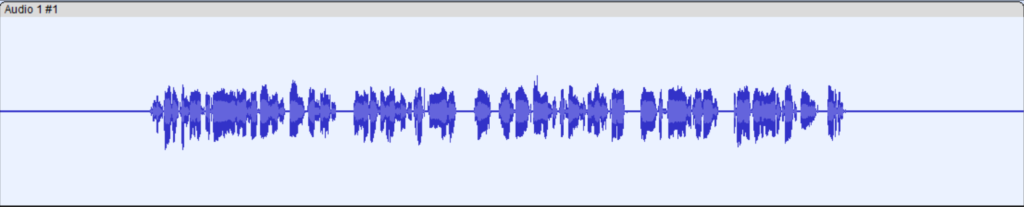
After applying compressor:
In compressor you’ll have two main settings you need to worry about. It’s Threshold and Ratio. Threshold will mark a point (threshold) from which audio levels will be reduced. Ratio determines how much your audio levels will be reduced.
When applying Audacity’s compression I like to use Ratio of 4:1 and Threshold will vary for each recording. The lower the threshold, the more aggressive compression you’ll get. You’ll have to try different compression settings to see what work for you, it’ll probably be in the -10dB to -20dB range. What you want to end up with is a fairly even looking audio waveform as in the example above, without any protruding peaks.
Go ahead and try compressor with the settings below but change Threshold value to find the sweet spot where your audio waveform looks fairly even.

After applying compression, again apply Normalize effect and set your Peak Amplitude to -3dB.
Now you should analyze your audio with ACX check and get the following results:
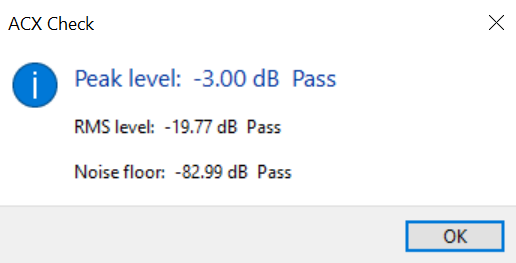
If you fail Noise Floor requirement, then go back to the Noise gate tool and apply more aggressive Level reduction.
If you fail RMS level requirement, then try applying more aggressive Compressor settings with lower Threshold.