When recording audio and video separately you’ll have to sync them one to another to match video footage to the sound. Usually, that’s required when recording video with a dedicated camera, while audio is recorded on a microphone that isn’t plugged into the camera.
Luckily, Premiere Pro has a built-in tool that allows you to synchronize your audio to video with a click. Here’s a step-by-step guide:
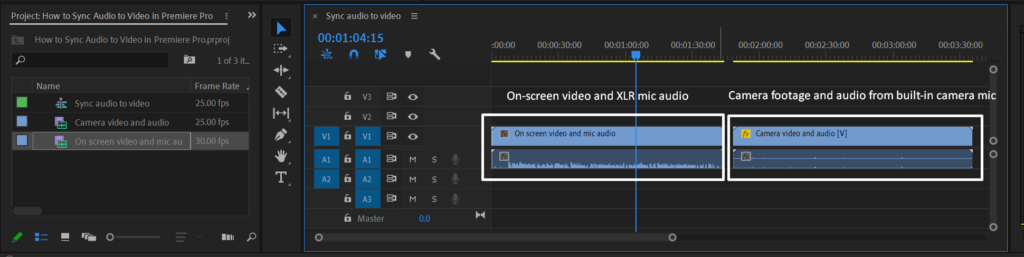
- Drag your audio and video footage onto the timeline
- Move camera video and audio onto separate tracks from the microphone and on-screen video track (if it was recorded)
- Place camera footage adjacent to microphone audio and on-screen video (if it was recorded)
- Select both camera and microphone audio and click the right mouse button
- Choose Synchronize
- Select Audio as Synchronize Point and click OK
- Select camera video footage, click the right mouse button and choose Unlink
- Delete redundant camera audio track.


When inserting your footage in the Premiere Pro timeline your audio will be linked with video. Once camera video footage and microphone audio are synchronized, you’ll need to unlink camera audio and video to delete audio track while maintaining video track.