Demudding is a process during which using an equalizer we remove frequencies that tend to muddy audio recording making it sound unclear. Attenuating these frequencies helps to add clarity to an audio recording. Most of the time, muddiness lays around 350Hz frequencies, a gentle 3dB cut in this range should remove muddiness from your audio.
Here’s a step by step guide on how to remove muddiness from audio:
- Using any audio editing software (DAW) select your audio
- Open equalizer effect
- Cut 3dB from frequencies around 350Hz range
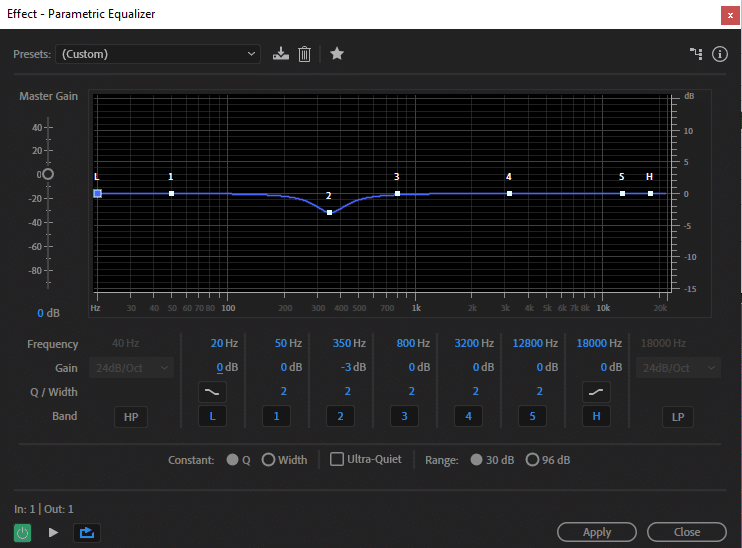
Everyone’s voice is different therefore, 350Hz might not be the exact frequencies you want to cut, but in general, that’s where the muddiness is prevalent. You can also play around by cutting different frequencies to see what works the best for you.
If your audio still doesn’t sound clear you can try increasing clarity by doing a wide boost in 2kHz-6kHz frequencies.
When boosting or cutting keep it up to 4dB. If you cut or boost by more than 4dB chances are your audio will start to sound unnaturally weird. For the best results cut/boost the least amount possible that makes your audio sound good. You should be subtle with EQ.
You can also read about improving audio quality here and preventing breaths here.
Pingback: How to Create a Deeper Voice in Premiere Pro? - Voice Over Tip